This document explains how to use the Captive Portal Management page in the SignLogger admin panel. The page is used to list, add and edit guest Wi‑Fi captive portal (the wireless guest login page) records. Alongside network settings such as Firewall IP, Guest Network and Redirect URL, you can also manage authentication methods — SMS, Form, Login, LDAP and 2FA — from a single screen.
Note: In the screenshots on this page, sensitive data such as IP addresses, device serial numbers, portal names and portal addresses have been masked for privacy.
1. List Screen and Columns
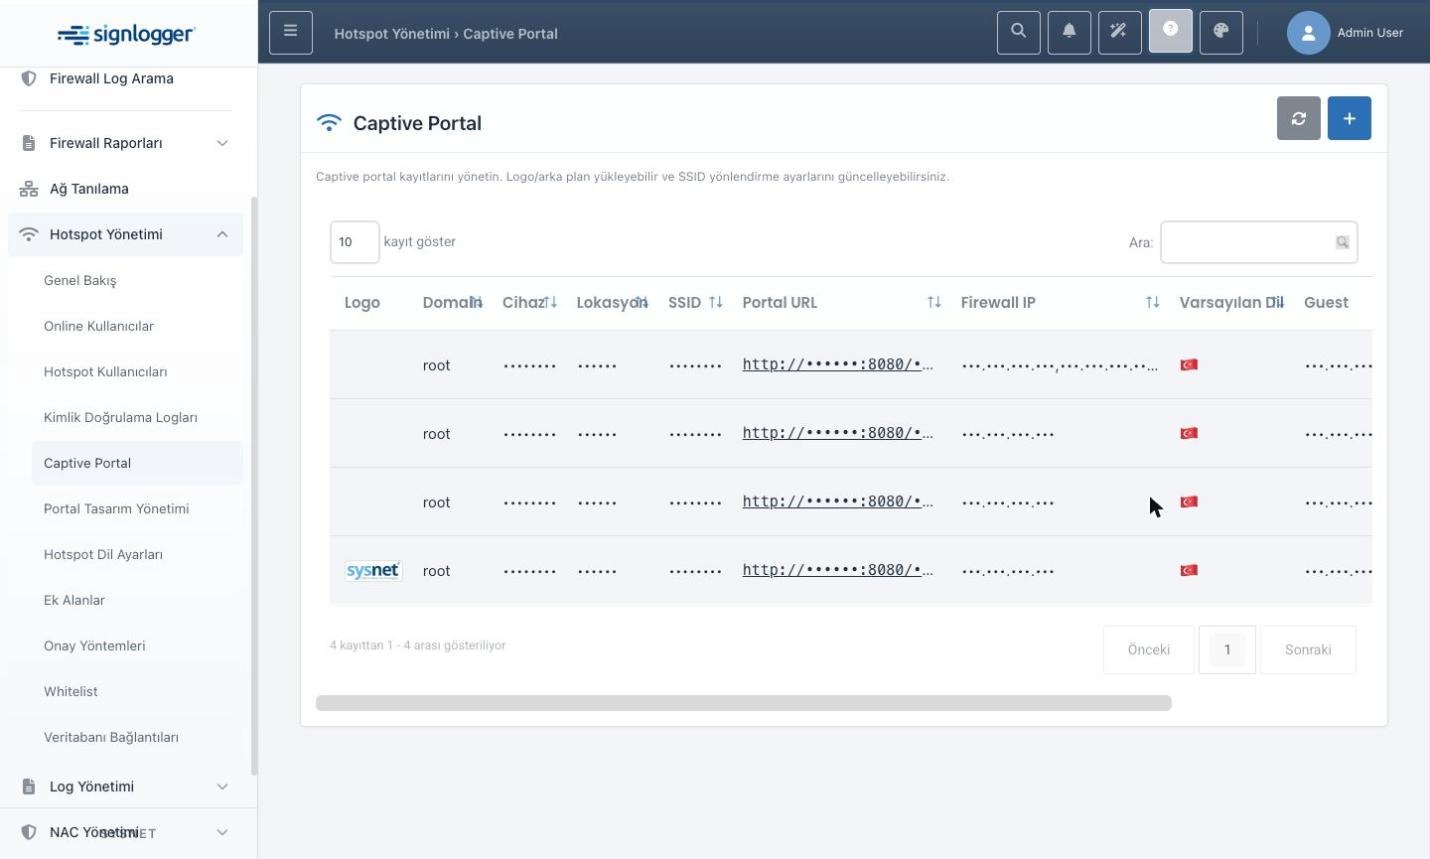
The Captive Portal Management screen shows all defined portal records in a table. The plus (+) button in the top‑right corner adds a new record; the refresh button next to it reloads the list. Each row in the list represents one portal record; the columns mean the following:
| Column | What it shows | Note |
|---|---|---|
| Logo | Portal logo (thumbnail) | May appear empty/with a warning if the logo cannot be served |
| Domain | The record’s domain | Visible only to the root user |
| Device | The device the portal is bound to | — |
| Location | The location name | — |
| Portal Name | The name that identifies the portal | — |
| Firewall IP | The allowed firewall IP/CIDR | Can be a comma‑separated list |
| Default Language | The portal’s default language | — |
| Guest | Guest network (CIDR list) | Required |
| Action | Edit / Delete | May be disabled depending on permissions |
Note: The Redirect URL is not shown in the list; it is managed only in the Network & Redirection section of the modal.
2. Adding and Editing a Record
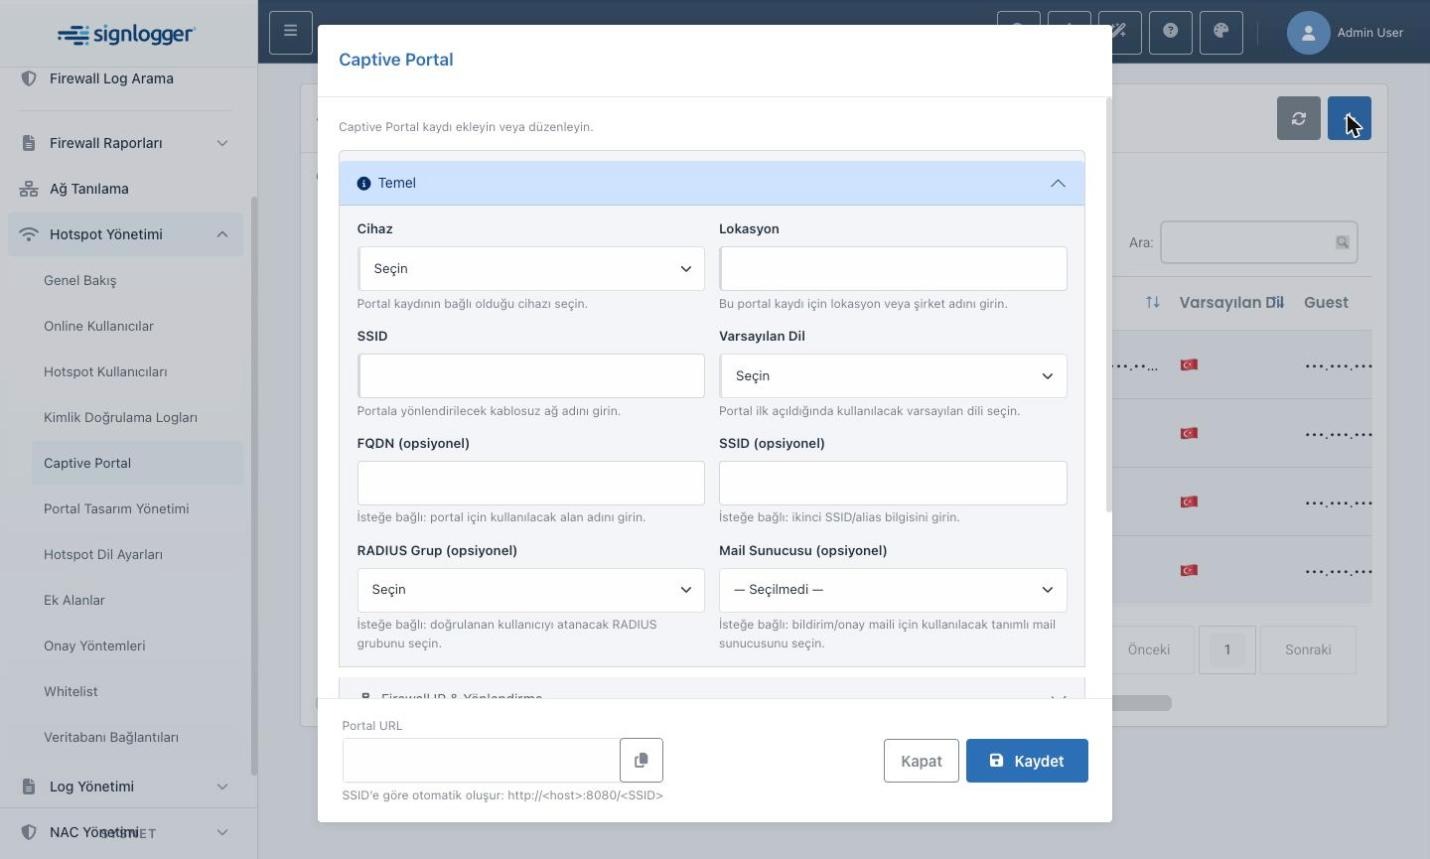
To create a new portal record, click the plus (+) button at the top right of the list. To update an existing record, use the Edit button on the relevant row. In both cases a form (modal) opens, consisting of the sections below. Sections can be expanded/collapsed by clicking their headers. Fill in the fields from top to bottom; make sure the required fields are filled before saving.
2.1 Basic
This section contains the portal’s basic identity information:
| Field | Description | Required |
|---|---|---|
| Device | Which device the record is bound to | Yes |
| Location | Used to group portal records | Yes |
| Portal Name | A unique name that identifies the portal; the portal link is built from this name | Yes |
| Default Language | The default language of the portal interface | Yes |
| FQDN (optional) | For the portal access address, depending on the setup | No |
| RADIUS Group (optional) | The group used in Captive Portal authentication | No |
| Mail Server (optional) | For mail integration | No |
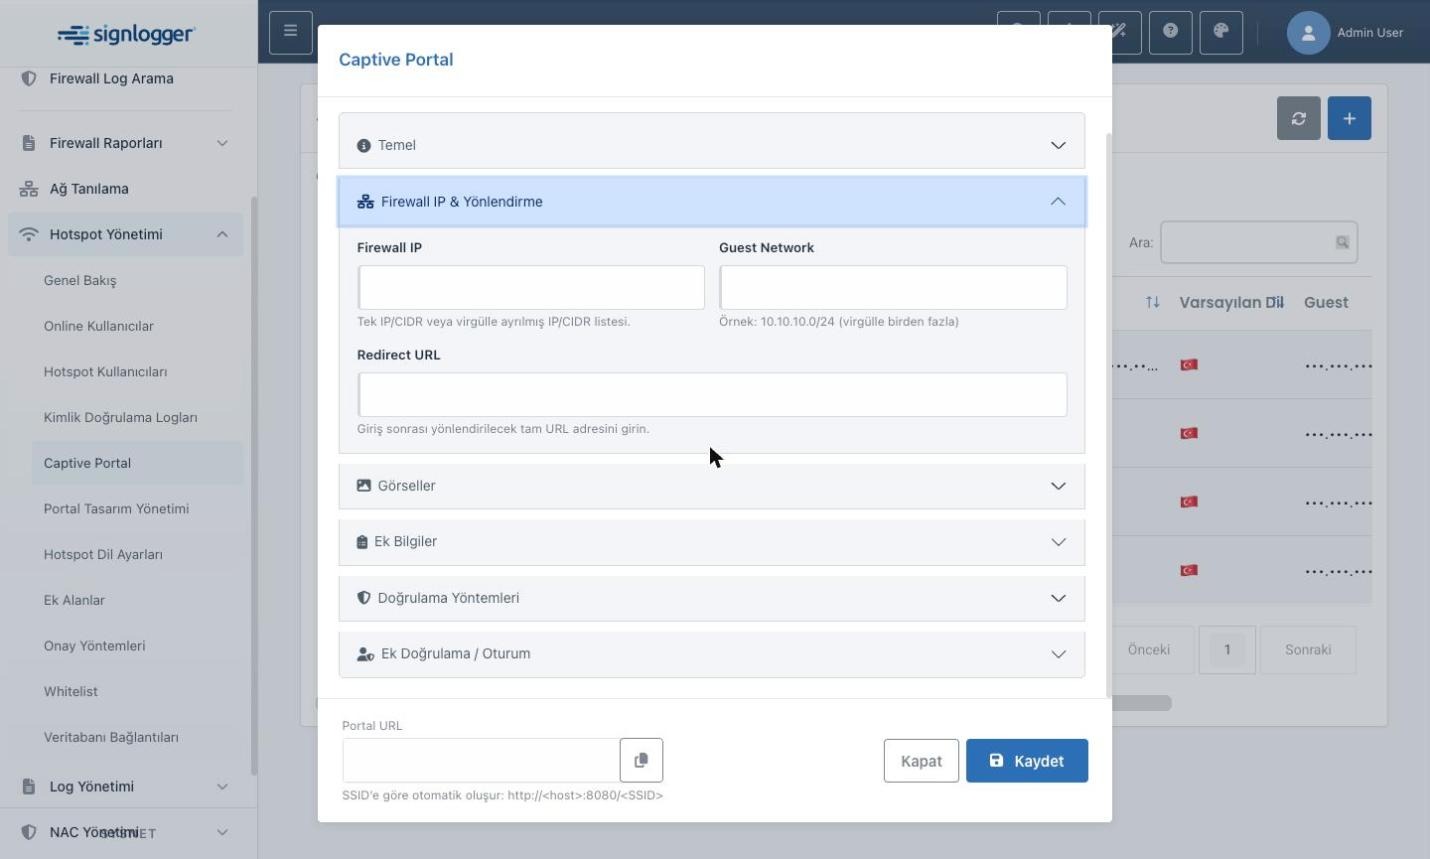
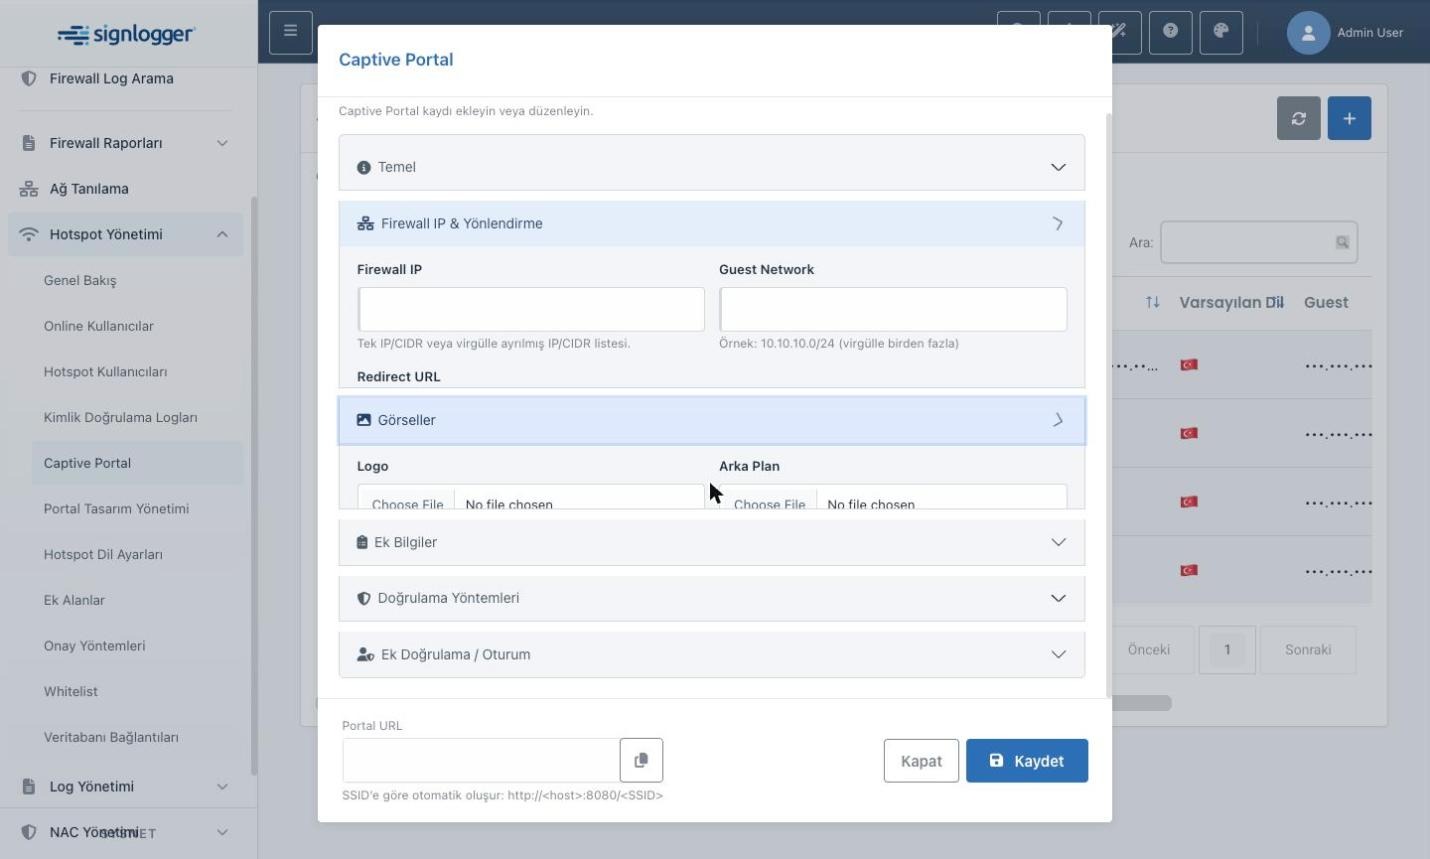
2.2 Network & Redirection
This section contains the portal’s network access and post‑login redirection settings:
| Field | Description | Required |
|---|---|---|
| Firewall IP | A single IP/CIDR or a comma‑separated list of IP/CIDR | Yes |
| Guest Network | A CIDR or comma‑separated CIDR list (e.g. 10.10.10.0/24) | Yes |
| Redirect URL | The address to redirect to after the portal | Yes |
2.3 Images
This section manages the images shown on the portal page:
| Field | Description | Required |
|---|---|---|
| Logo | You can select and upload a logo file | No |
| Background | You can select and upload a background file | No |
| Delete | Removes the current image | Requires permission |
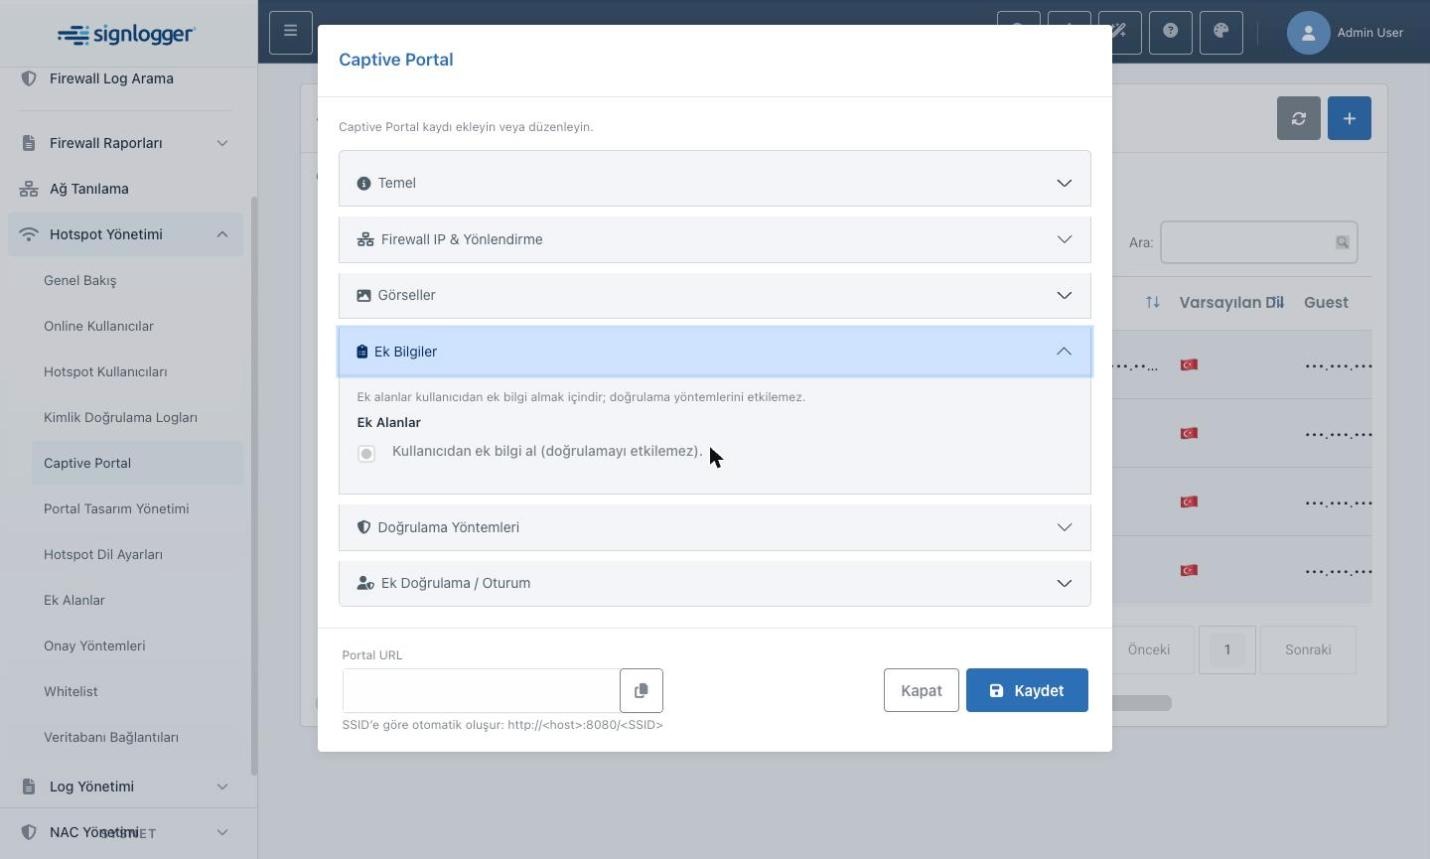
2.4 Additional Information
| Field | Description | Required |
|---|---|---|
| Additional Fields | Enables/disables collecting extra information from the user on the portal | No |
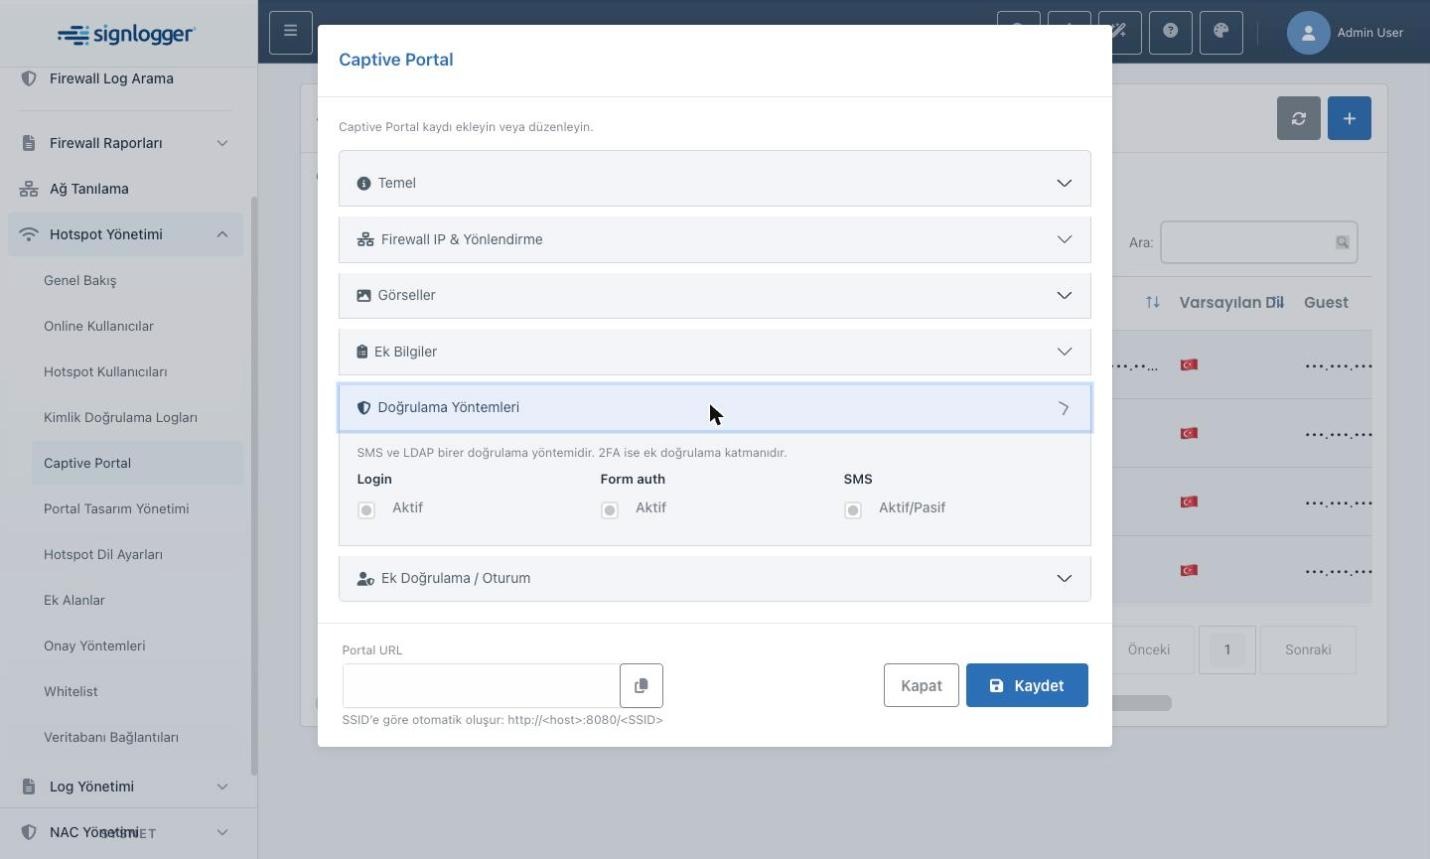
2.5 Authentication Methods
This section enables or disables the methods used to log in to the portal:
| Field | Description | Required |
|---|---|---|
| Login | Enables/disables username‑password login | No |
| Form auth | Enables/disables form authentication | No |
| SMS | Enables/disables SMS authentication | No |
| SMS Method | Selected when SMS is on | Conditional |
| SMS Provider | Selected when SMS is on | Conditional |
| LDAP | Enables/disables LDAP authentication | No |
| LDAP Config / Fallback | Selected when LDAP is on | Conditional |
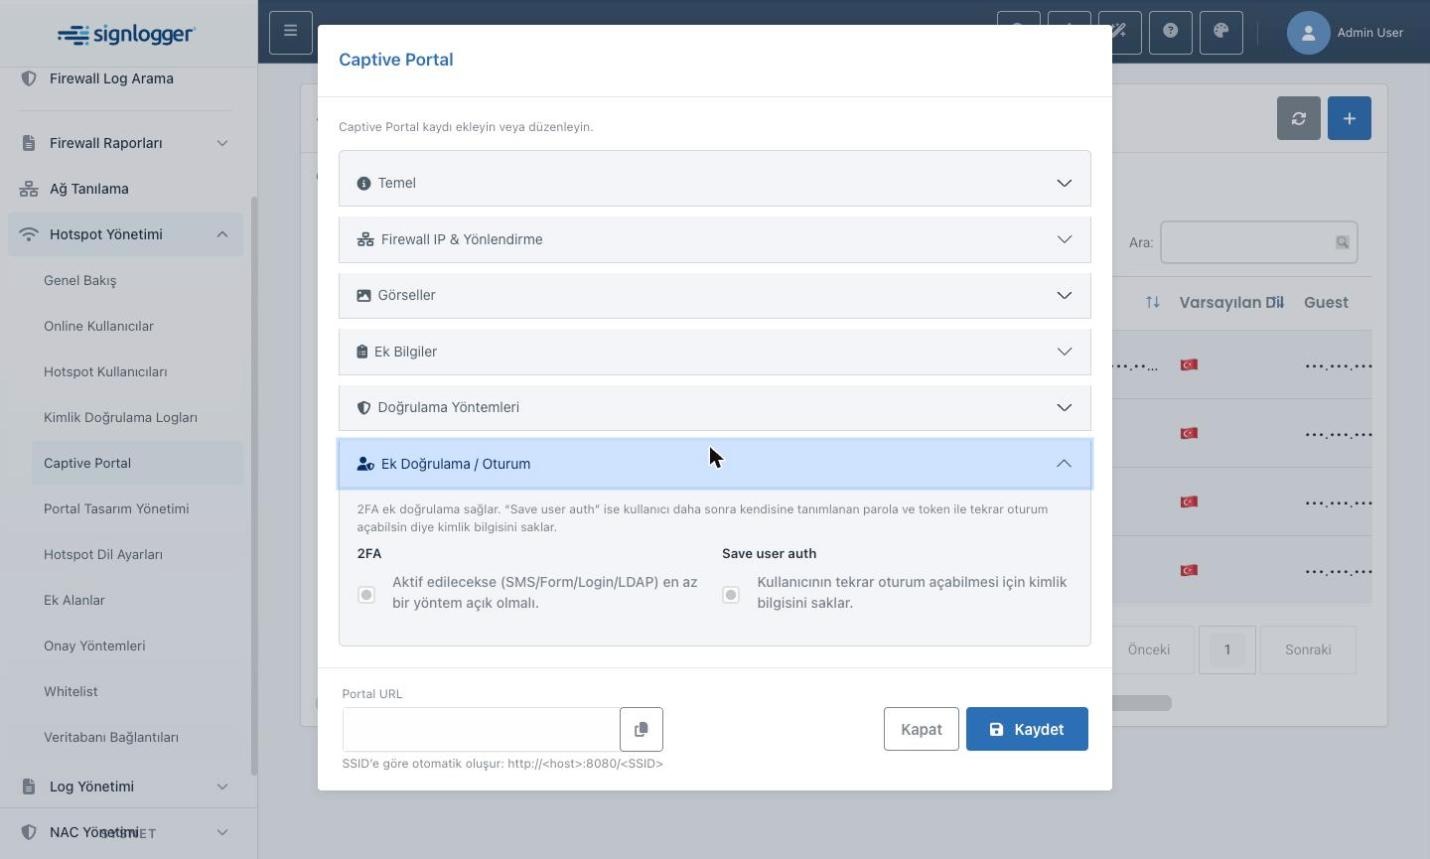
2.6 Extra Authentication / Session
| Field | Description | Required |
|---|---|---|
| 2FA | Additional authentication layer | Conditional |
| Save user auth | Stores the user identity (for logging in again) | No |
3. Logging In with LDAP
Guests can log into the portal with an Active Directory / LDAP account. The user’s password is not stored in the product — the system connects to LDAP only at the moment of authentication and then discards it; only the group membership is recorded (no persistent password record is kept). The user is also assigned only to the portal’s defined group; their other AD groups (e.g. admin) are not carried into the portal session.
For users to log in with their Active Directory / LDAP account on the portal, all of the following must be satisfied:
- LDAP definition ready: There must be an active, default LDAP (AD) definition in LDAP Settings, and the connection test must succeed. This definition is shared with NAC.
- LDAP enabled on the portal: In this modal, Authentication Methods → LDAP must be on and an LDAP Config selected (optionally a second definition as Fallback).
- The portal’s RADIUS Group must match the user’s AD group EXACTLY (critical): The group name you enter in the RADIUS Group field (e.g.
Guest_Group) must be exactly the same (case‑insensitive) as one of the user’s AD groups. Even if the user authenticates with the correct password, if they are not a member of this group access is denied and the user is not recorded anywhere (leaves no trace). If it matches, the user is assigned only to this group; their other AD groups (e.g. admin groups) are not carried into the portal session. (Example: AD user ismail.aktas, AD group guest_grup; the portal’s RADIUS Group setting is guest_grup → matches, access granted. If the user is not a member of guest_grup → denied.) - A login method is on: Login or Form auth must be enabled on the portal; the user logs in with their AD username + password.
If authentication succeeds, the user is added to the portal’s RADIUS Group and the portal session opens. If LDAP fails, the system falls back to local user authentication.
Tip — use a separate AD group for guests: To keep access clear, define a separate AD group containing only real guests (e.g.Guest_Group) as the portal’s RADIUS Group value; do not add admin/corporate users to this group. The fail‑closed group gate already lets in only members of this group.
Note: Because the portal LDAP login no longer stores the password or a persistent session record, the same AD user can safely take part in the guest portal, 802.1x and firewall‑admin logins alike — the old “wrong VLAN / 2FA SMS cannot be sent” conflict that this record used to cause no longer exists.
Design (fail‑closed — deliberate, not a limitation): The goal is NOT to let all AD users in; only the members of the single group you defined for the portal get in. This way an admin (e.g. a member of Domain Admins / User_Login but not of guest_grup) cannot enter through the guest portal, and the admin identity does not leak into the portal session.
If the RADIUS Group field is left EMPTY (backward compatibility): the exact‑match check is disabled and the old behavior applies — access is granted if any of the user’s AD groups is registered under NAC → Objects → Groups (ldap type, active). For new deployments, filling in the RADIUS Group field is recommended (more secure and clearer).
If “LDAP is correct but login doesn’t work”: it is almost always item 3 — the portal’s RADIUS Group setting and the user’s AD group name are not exactly the same (including spelling/case differences). Enter the AD group name (the CN inmemberOf) exactly into the RADIUS Group field. You also need network access to the DC (389/636) and a correct user search filter ((sAMAccountName=%{User-Name})).
4. Portal URL
The Portal URL is generated automatically from the entered Portal Name and has the form: http://<host>:8080/<portal-name>. Here <host> is taken from the IP or FQDN in the browser; the last segment comes from the Portal Name field in the form. This address is shown at the bottom of the form and can be copied to the clipboard with the copy button. The Redirect URL is not shown in the list; it is managed only in the Network & Redirection section.
You need to copy and paste the generated Portal URL into the appropriate field used for captive portal redirection on your firewall device. When users request internet access, the firewall redirects them to this address and authentication is carried out through this portal. Each firewall brand/model may have a different method for adding the captive portal (external portal) URL; this setting is usually found under headings such as Guest/Hotspot, Captive Portal, External Portal or Authentication Portal.
5. Cisco Meraki Integration (Cloud‑Based — Behind Any Firewall)
Cisco Meraki works cloud‑based: the internet access grant is given not on a local device but in the Meraki cloud (*.network-auth.com). Therefore the Meraki AP/appliance can sit behind any firewall/NAT — SignLogger does not need direct network access to the device (as it does with FortiGate / SonicWall / WatchGuard / Zyxel). What is required is that the client can reach both the SignLogger portal and the Meraki cloud.
5.1 How It Works (EXCAP Click‑Through)
- The user lands on the Meraki splash page → Meraki redirects the user to the SignLogger portal with
base_grant_url(+ optionaluser_continue_url) parameters. - The user is authenticated in SignLogger (SMS / Form / Login / Turkish ID / LDAP — whichever is enabled).
- SignLogger produces a Meraki grant URL (
base_grant_url+continue_url+duration) and sends the client browser there via a GET redirect. - The Meraki cloud opens access; the user continues to their destination (
continue_url).
5.2 Configuration
- Device Type: Cisco Meraki (vendor: Cisco); in the SSID record,
firewall_type = meraki. - FQDN:
*.network-auth.com(wildcard). The Meraki hostname varies by region (eu. / n143. / apac. …), so a full host is not expected; the*.network-auth.comsuffix is treated as trusted. - Meraki Dashboard: The relevant SSID’s splash is set to “External Captive Portal (EXCAP)”; splash URL = the SignLogger portal address. Add the SignLogger portal address +
*.network-auth.comto the walled garden (the client must be able to reach these before authentication).
5.3 Session Duration and Security
- Duration (
duration): Comes from the NAC / RADIUS Session‑Timeout; capped at 30 days. - Open‑redirect protection: The grant is made only to a validated
*.network-auth.comHTTPS address. - Session termination: Access ends when the duration expires on the cloud side; no “drop the user” command is sent to the local firewall (Meraki uses session duration / timeout instead of active deauth).
6. Saving and Usage Recommendations
- Do not leave the required fields (Device, Location, Portal Name, Default Language, Firewall IP, Guest Network, Redirect URL) empty; conditional fields are filled only when the relevant method is on (e.g. SMS Method and SMS Provider when SMS is enabled).
- To enable 2FA, at least one of the SMS, Form, Login or LDAP methods must be on.
- This help content explains the purpose of the on‑screen fields without going into technical integration detail. Work from top to bottom; double‑check the values before saving.
- On an unexpected result, first review the date range, filters and selections; then verify from the list/summary area of the relevant page.
- Once all fields are complete, click the Save button at the bottom of the form; use the Close button to cancel.