On SonicWall firewalls, the external captive portal feature is used to authenticate guest network users before they reach the internet. This guide explains step by step how to integrate SonicWall's external captive portal with SignLogger for guest authentication.
Introduction
External captive portal redirects users joining the guest network to an authentication page hosted on an external server such as SignLogger instead of SonicWall's built-in login page. User verification and reporting are then handled centrally on the SignLogger platform, and guest activity is recorded in line with regulations. This document covers configuring syslog on the SonicWall, defining a dedicated guest zone and interface, configuring RADIUS authentication and finally creating the security policies. Before starting you need: access to the SonicWall management panel, the SignLogger server address and port, an IP block reserved for the guest network, and the RADIUS server address with its shared secret.
Step 1: Configuring the SignLogger Syslog Server (Device > Log > Syslog)
Define a syslog server first, before any captive portal or RADIUS settings, so that the guest zone, interface and policy activity you create later is forwarded to SignLogger from the start:
- Go to Device > Log > Syslog and open the Syslog Servers tab.
- Click Add to define a new syslog server.
- Enter your SignLogger server's IP in Name or IP Address.
- Enter the syslog port SignLogger listens on (default
514) in Port. - Make sure Server Type is Syslog Server; adjust Syslog Format and Syslog Facility as needed.
- Click Add to save.
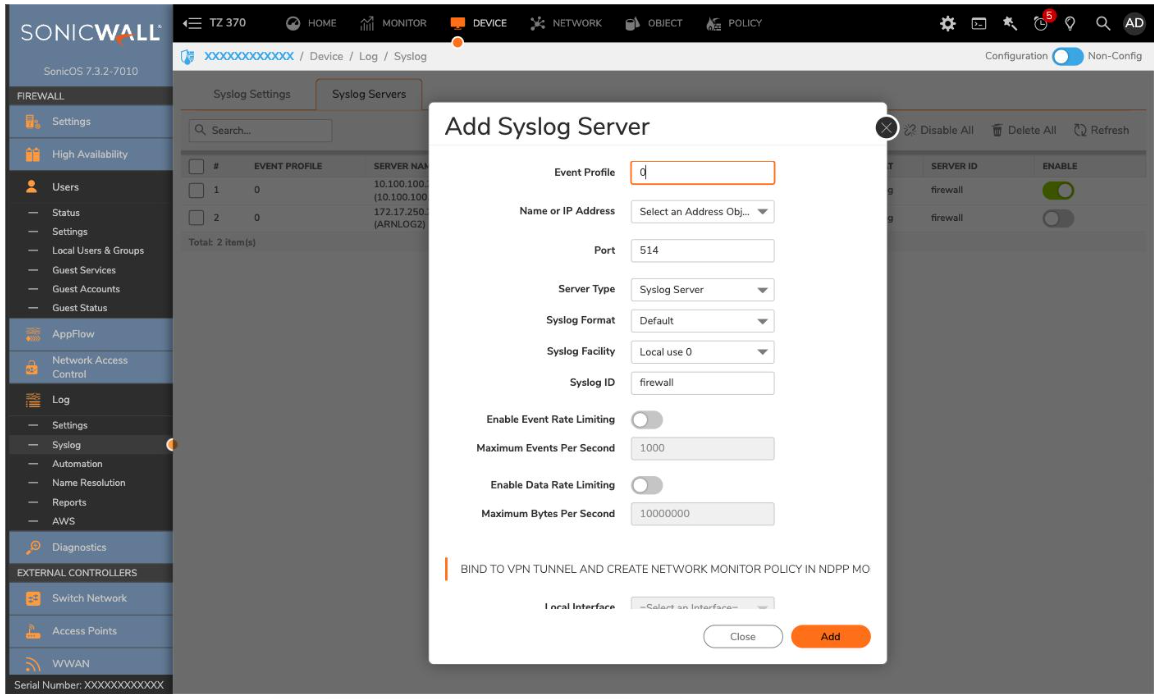
Screenshot 1: Device > Log > Syslog > Syslog Servers — Add Syslog Server.
The server appears in the Syslog Servers list after saving. Confirm the switch in the Enable column is on — otherwise logs are not delivered to SignLogger.
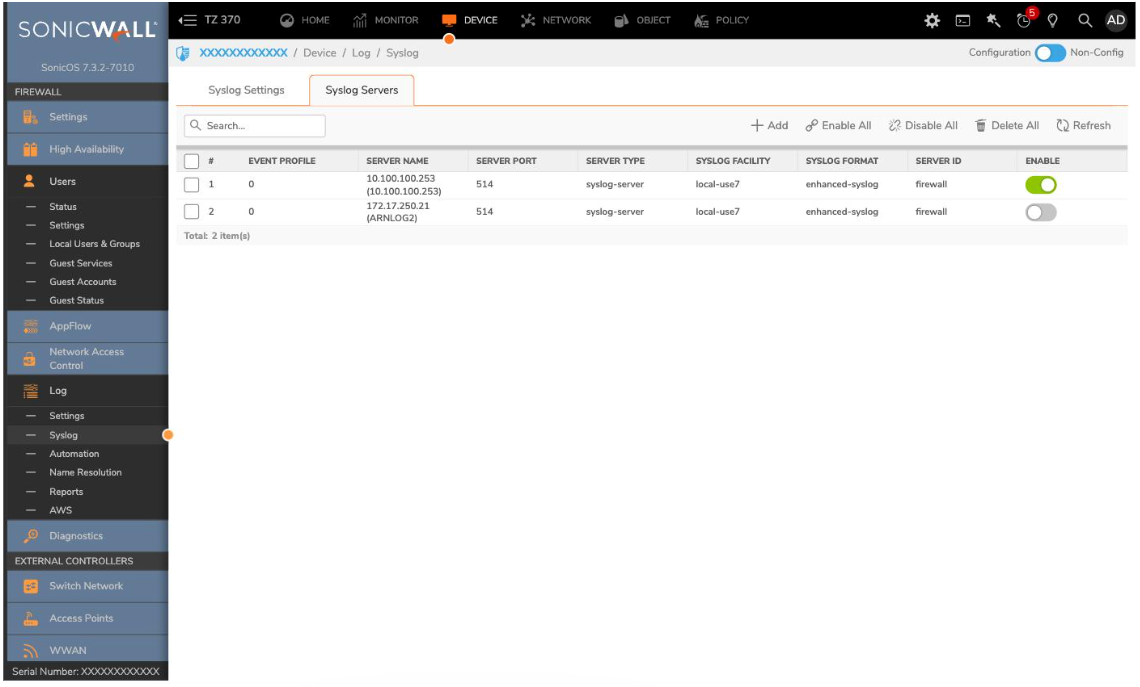
Screenshot 2: The list of defined syslog servers.
Step 2: Creating the Guest Zone (Object > Zones)
- Go to Object > Match Objects > Zones.
- Click Add to create a zone named
Guest. - On the General tab set Security Type to Trusted; enable Allow Interface Trust if needed.
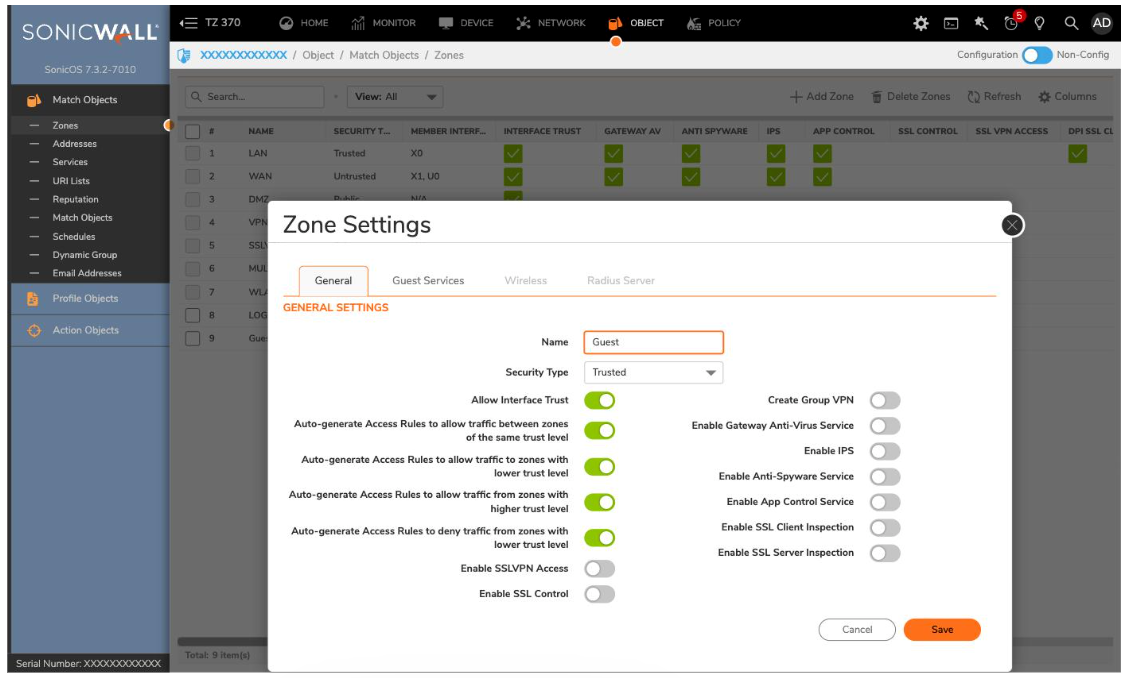
Screenshot 3: Guest zone — General settings.
Then configure Guest Services so guests authenticate through SignLogger:
- In the Zone Settings window switch to Guest Services and enable External Guest Authentication.
- Click Configure; in the window enter the SignLogger server address in Web Server 1, set Protocol to HTTP and specify the listening port (e.g.
8080). - On the Auth Pages tab select the page to use in Login Page (e.g.
SW_GUEST) and save.
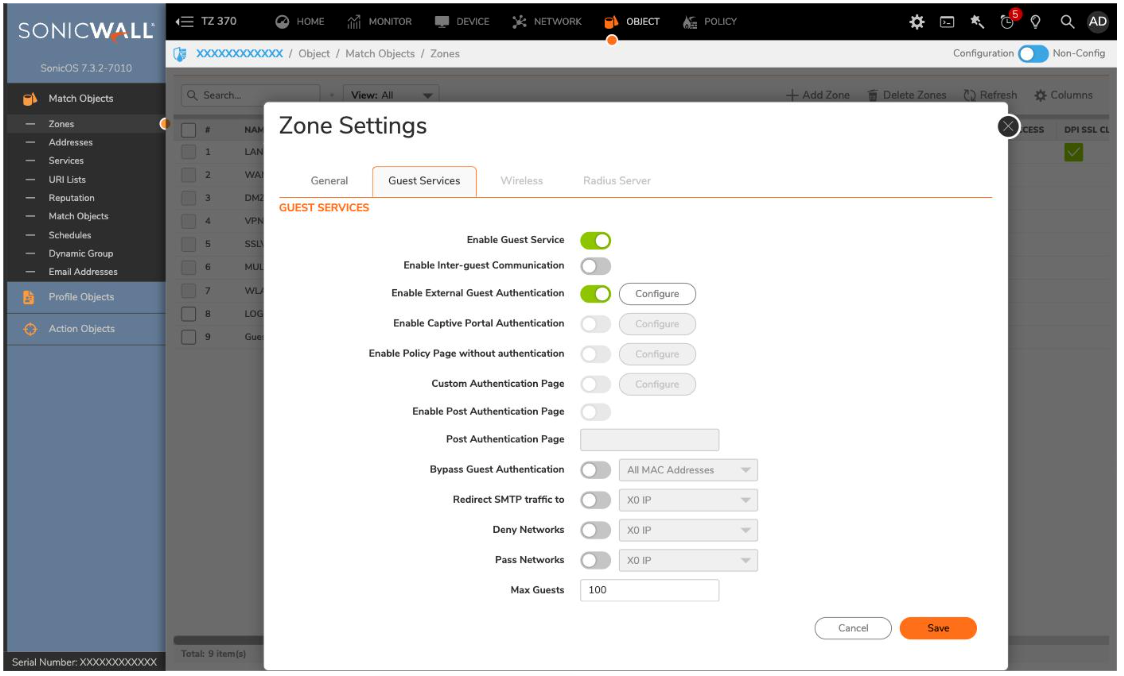
Screenshot 4: Guest zone — Guest Services.
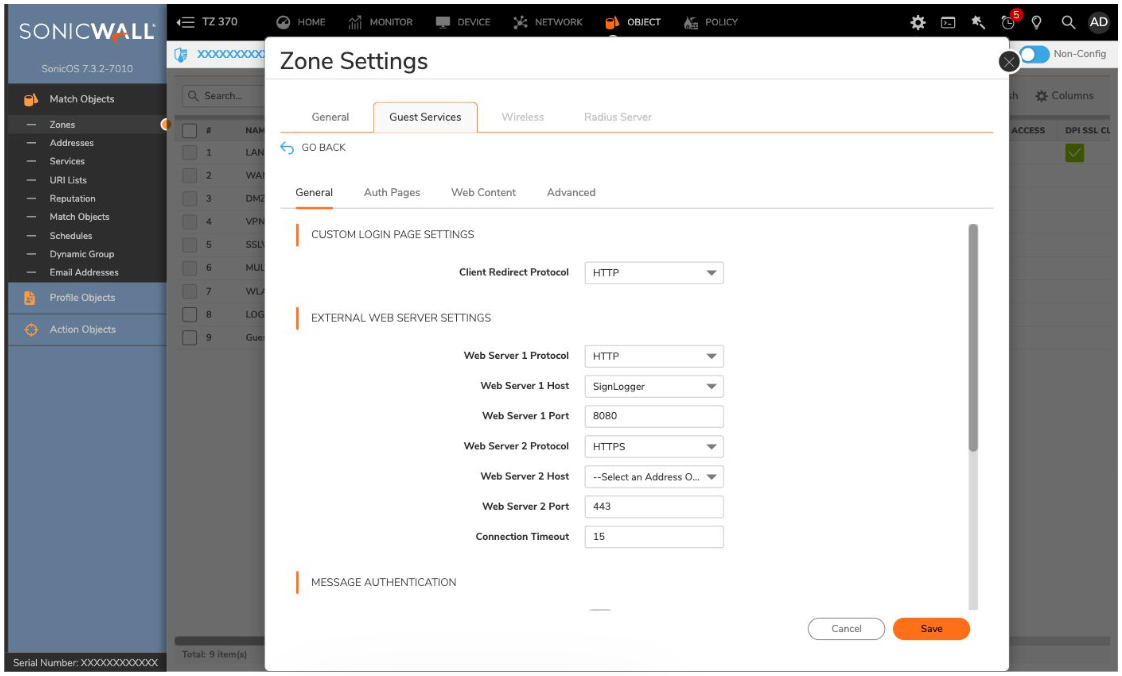
Screenshot 5: Configure — Web Server 1 (SignLogger).
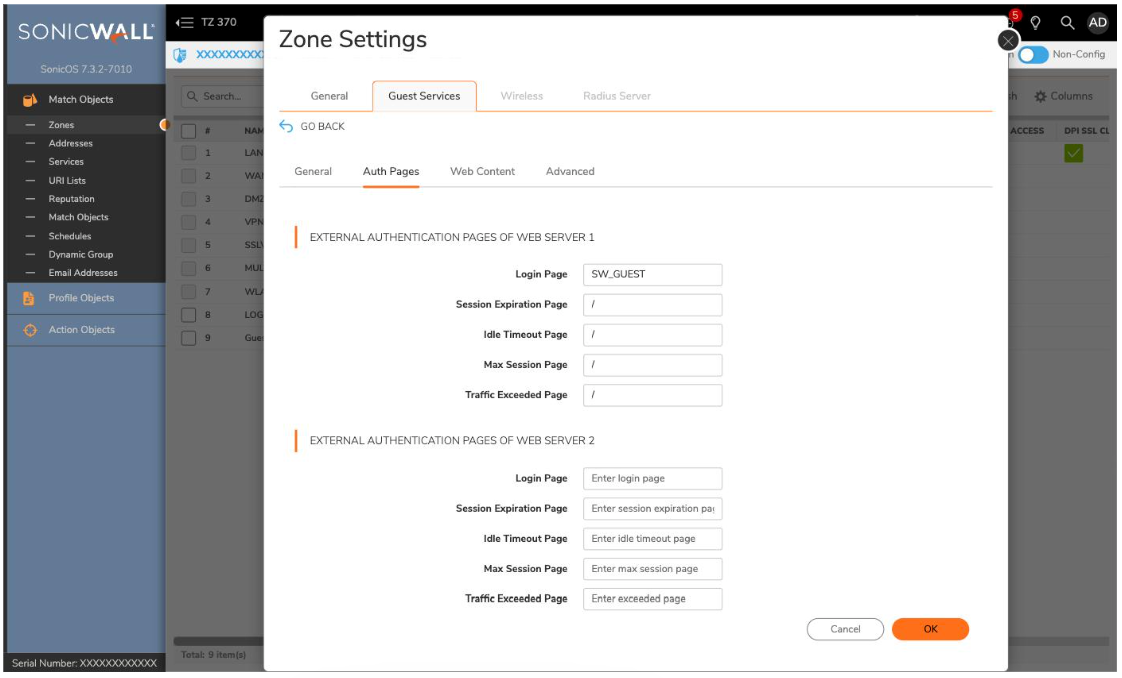
Screenshot 6: Configure — Auth Pages.
Step 3: Guest Network and Interface (Network > Interfaces)
- Go to Network > System > Interfaces.
- Select the interface for the guest network (e.g.
X0:V22) and click Edit. - Set Zone to Guest.
- Enter the VLAN Tag and Parent Interface (e.g. VLAN 22 on X0).
- Under IP Assignment choose Static and enter the guest IP block.
- Save with OK.
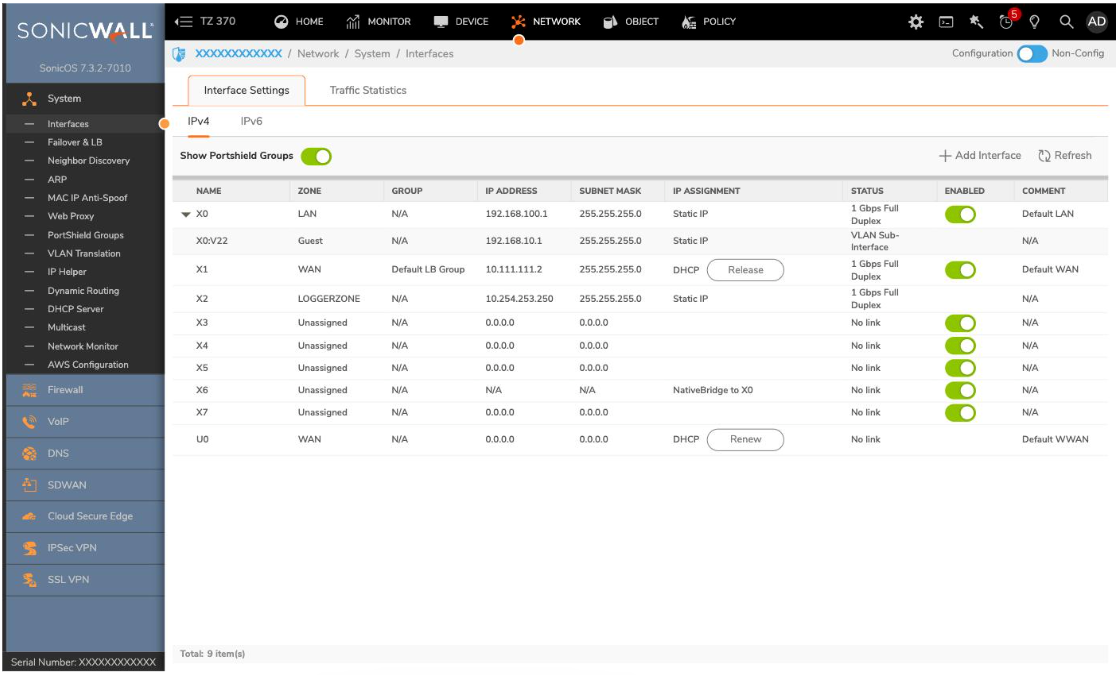
Screenshot 7: Interface list.
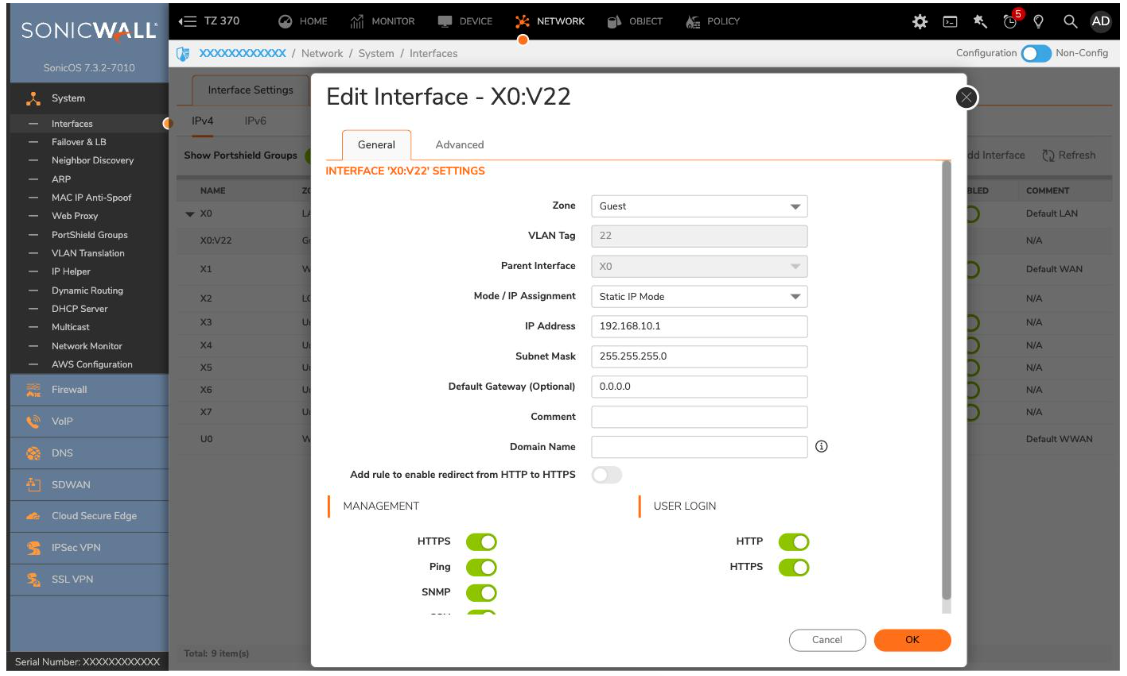
Screenshot 8: Edit Interface (X0:V22).
Step 4: RADIUS Authentication (Device > Users > Settings)
- Go to Device > Users > Settings, open the Authentication tab.
- Set User authentication method to RADIUS + Local Users.
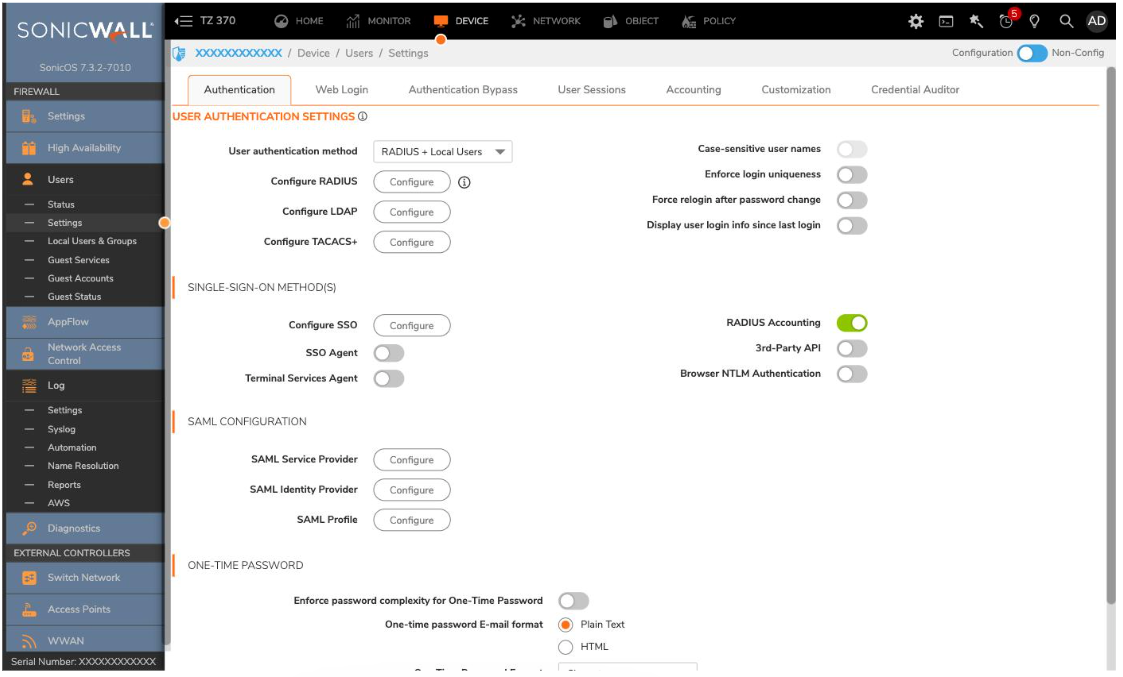
Screenshot 9: Authentication settings (RADIUS + Local Users, RADIUS Accounting active).
Click Configure RADIUS to set connection details:
- On RADIUS Servers click Add and enter the server IP (e.g.
10.100.100.253) and port1812. - On General Settings set Timeout (e.g. 5 s) and Retries (e.g. 3), then enable Periodically check RADIUS server status.
- On Accounting enable RADIUS Accounting so guest session records reach SignLogger.
Step 5: Security Rules for the Guest Network (Policy > Rules and Policies)
Define a policy set where guest traffic can only exit to the internet (WAN), cannot reach internal resources, and can reach the SignLogger server when needed:
- Go to Policy > Rules and Policies > Access Rules and view the rules for the Guest zone.
- Create (or edit) an Allow rule from Guest to WAN.
- Create a separate Allow rule from Guest to LOGGERZONE (the zone hosting SignLogger) so guest devices can reach the captive portal page and the SignLogger API.
- Create a Deny rule from Guest to the other internal zones (LAN, DMZ etc.) to isolate the guest network.
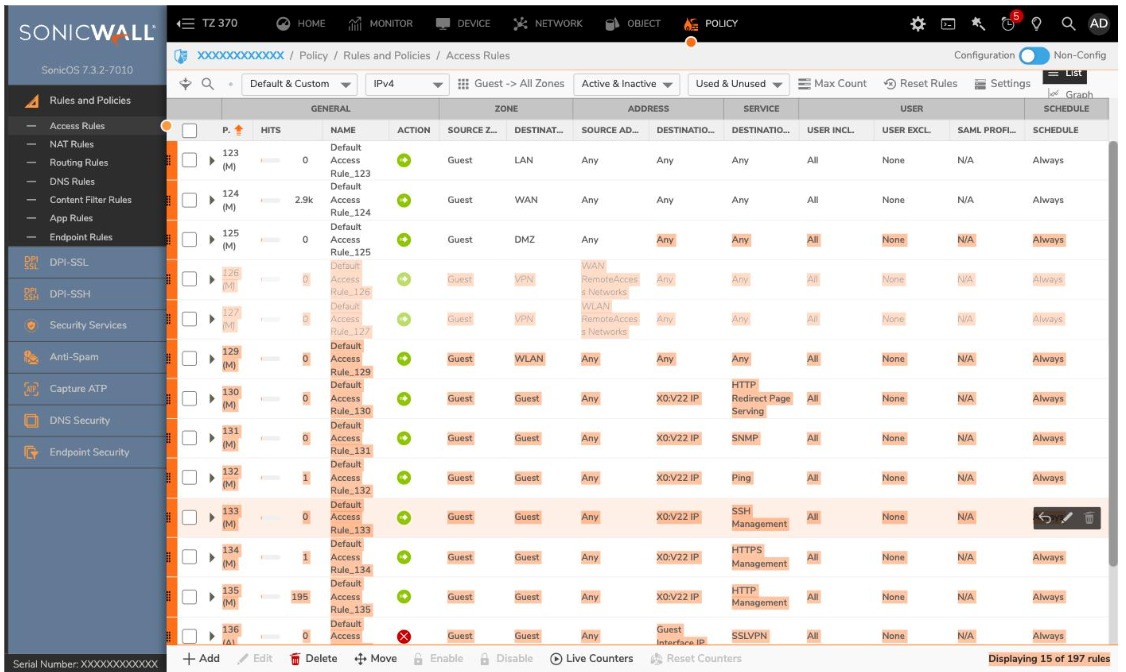
Save the rules and verify them with a test connection from a client in the Guest zone.
Conclusion
SonicWall external captive portal integration with SignLogger is completed by configuring syslog, defining the Guest zone and interface, configuring RADIUS authentication and creating the security policies. Applying these steps in order ensures guest authentication and internet access records are kept completely on SignLogger.