This guide explains step by step how to configure log delivery to SignLogger, RADIUS-based authentication and captive portal (web authentication) integration on the Sophos Firewall (XG) management panel — for both the guest network and general traffic. It covers: defining the syslog server, selecting the log types to send, enabling the API so SignLogger can pull data, RADIUS server and accounting settings, selecting the RADIUS server as an authentication method on the Services page, defining a custom HTML page for web authentication, enforcing web authentication for unknown users on the guest network, and finally adding the NAT rule to the guest security policies.
Step 1: Syslog Server (System services > Log settings)
- Open System services > Log settings from the left menu.
- In Syslog servers, click Add.
- Enter
SignLoggeras the Name, the SignLogger address (e.g.10.100.100.253) as Server IP, and514as Port. - Adjust Facility and Severity as needed and save.
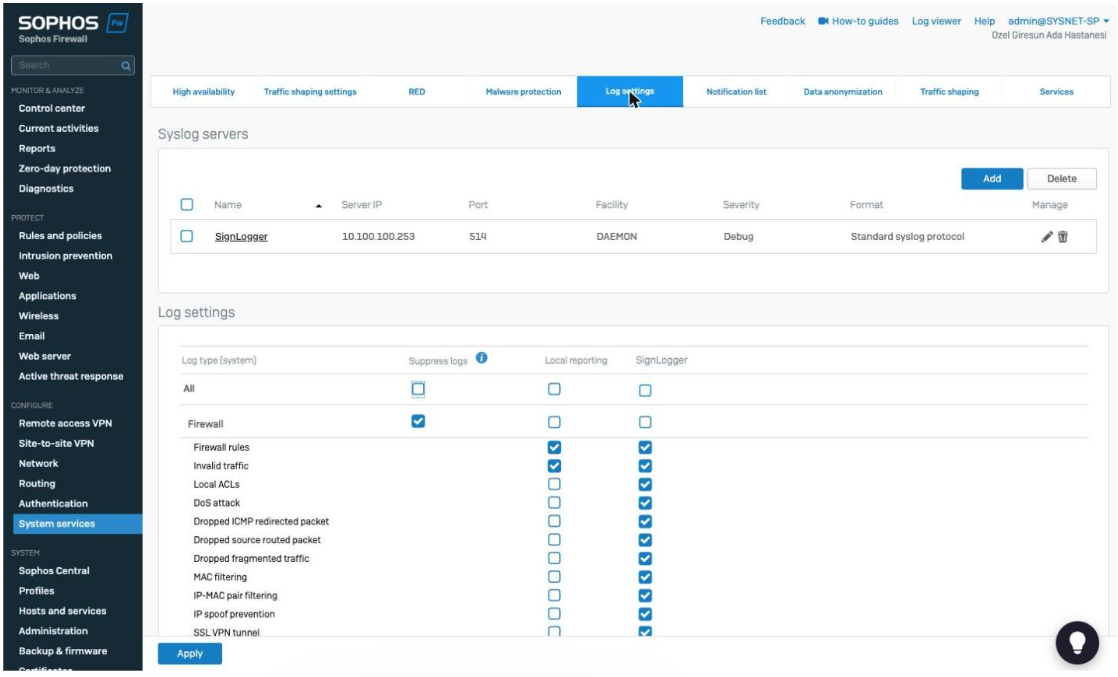
Screenshot 1: System services > Log settings — SignLogger syslog server.
Step 2: Selecting the Log Types to Send
In the Log settings table on the same page, tick the log categories to forward to SignLogger (Firewall rules, Invalid traffic, IPS, Antivirus etc.), then click Apply.
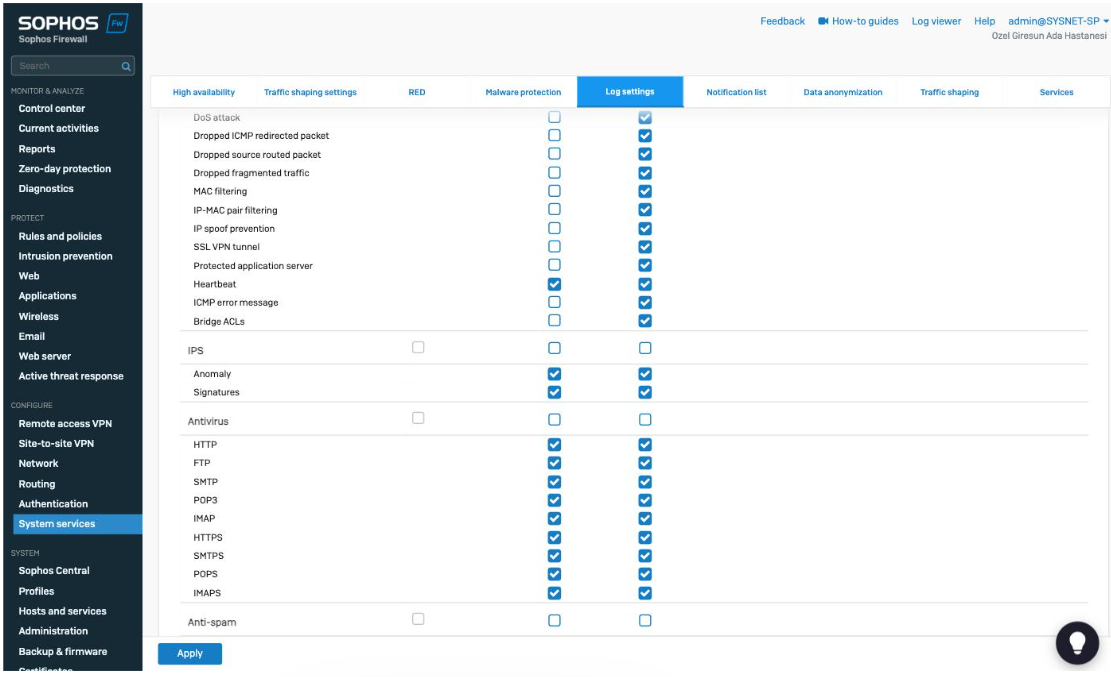
Screenshot 2: Selecting the log types (IPS, Antivirus, etc.).
Step 3: Enabling the API (Backup & firmware > API)
- Open Backup & firmware and switch to the API tab.
- Make sure Enabled is ticked under API configuration.
- Add the SignLogger server's IP to the Allowed IP address list — SignLogger uses this to pull the data it needs from the Sophos API.
- Save with Apply.
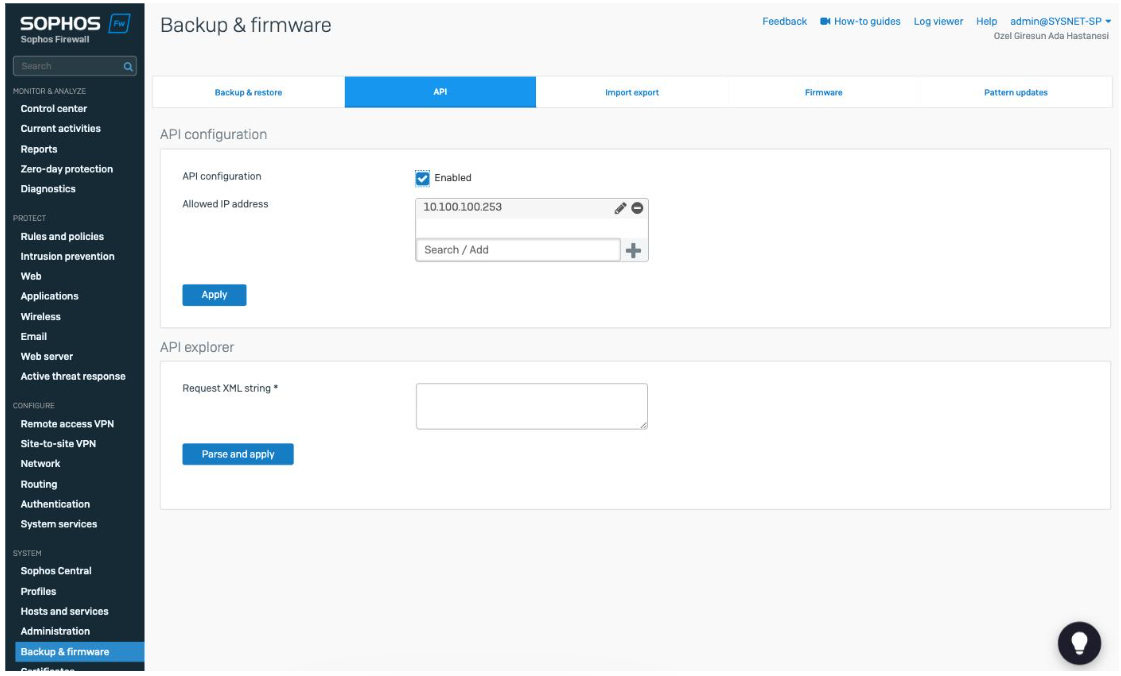
Screenshot 3: Backup & firmware > API — API configuration and Allowed IP address.
Step 4: RADIUS Server (Authentication > Servers)
- Open Authentication > Servers and click Add.
- Set Server type to RADIUS server; name it
SignLogger, Server IP10.100.100.253, Authentication port1812. - Tick Enable accounting with Accounting port
1813; fill Shared secret with the key defined on the SignLogger side. - Save.
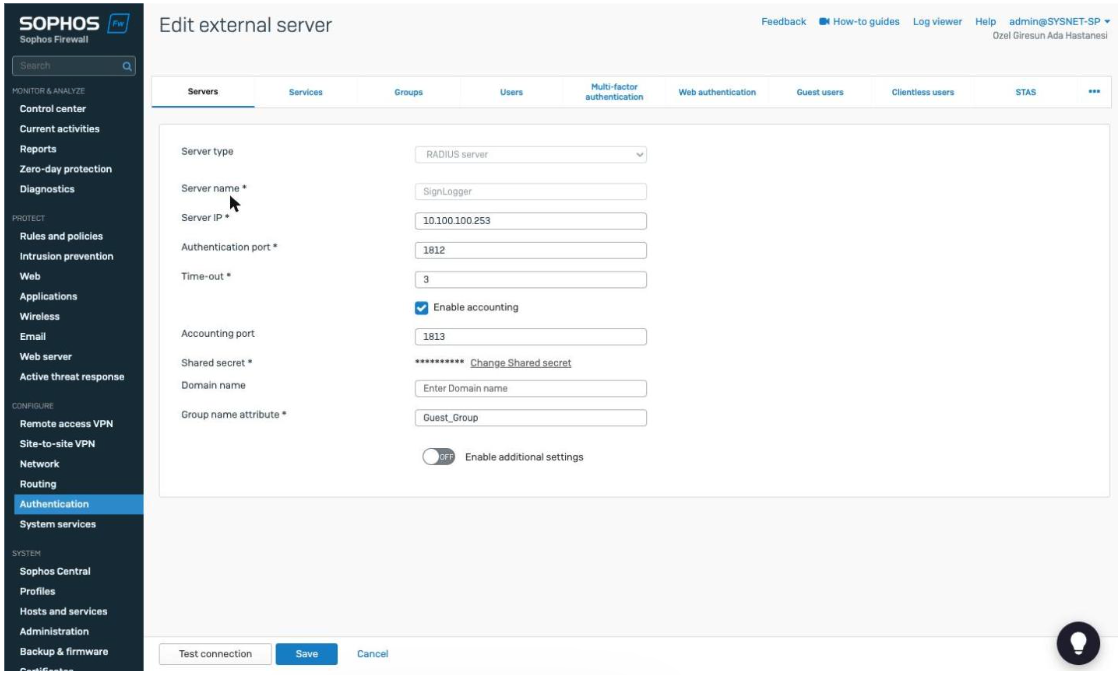
Screenshot 4: Authentication > Servers — SignLogger RADIUS with accounting.
After adding the server, open Authentication > Services. Under Firewall authentication methods, move SignLogger from the Authentication server list into the Selected authentication server list and click Apply. Until this step is done, the RADIUS server is not used for authentication.
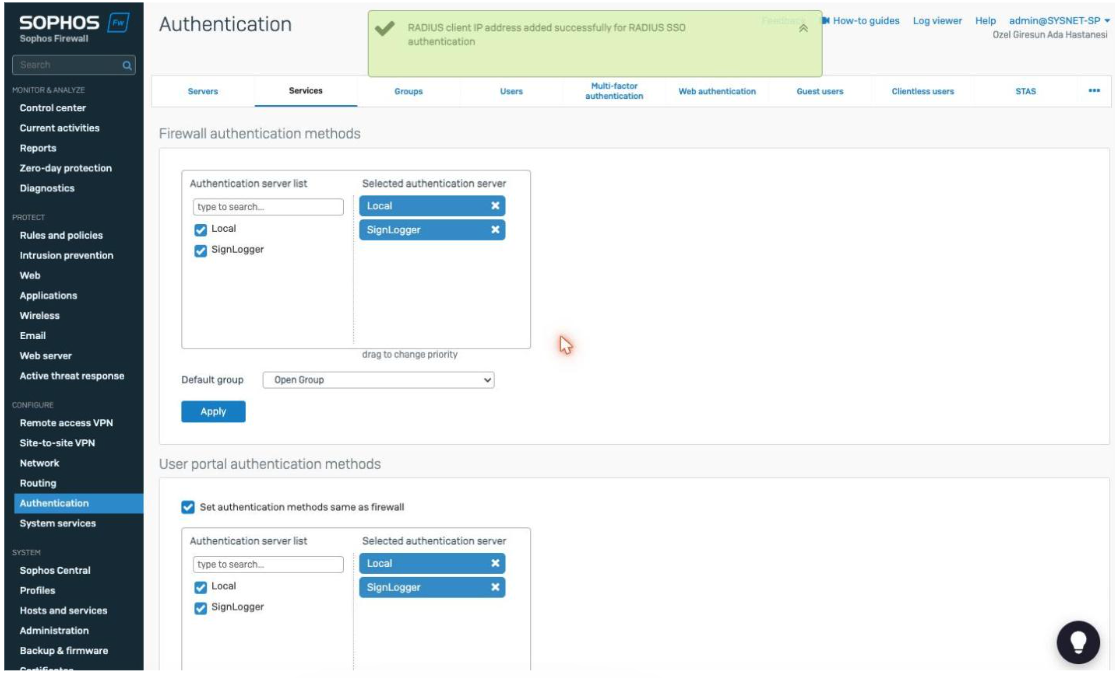
Screenshot 5: Authentication > Services — SignLogger in the selected server list.
Step 5: Web Authentication and the Custom HTML Page
- On Authentication > Web authentication, adjust the display options under Captive portal behavior (Show user portal link, Show web page after sign-in, etc.) as needed.
- Under Captive portal appearance set Layout to Custom HTML.
- Paste the HTML generated on the SignLogger platform into the code area — remember the code must contain a
<div>element with the__loginboxid. - Save with Apply.
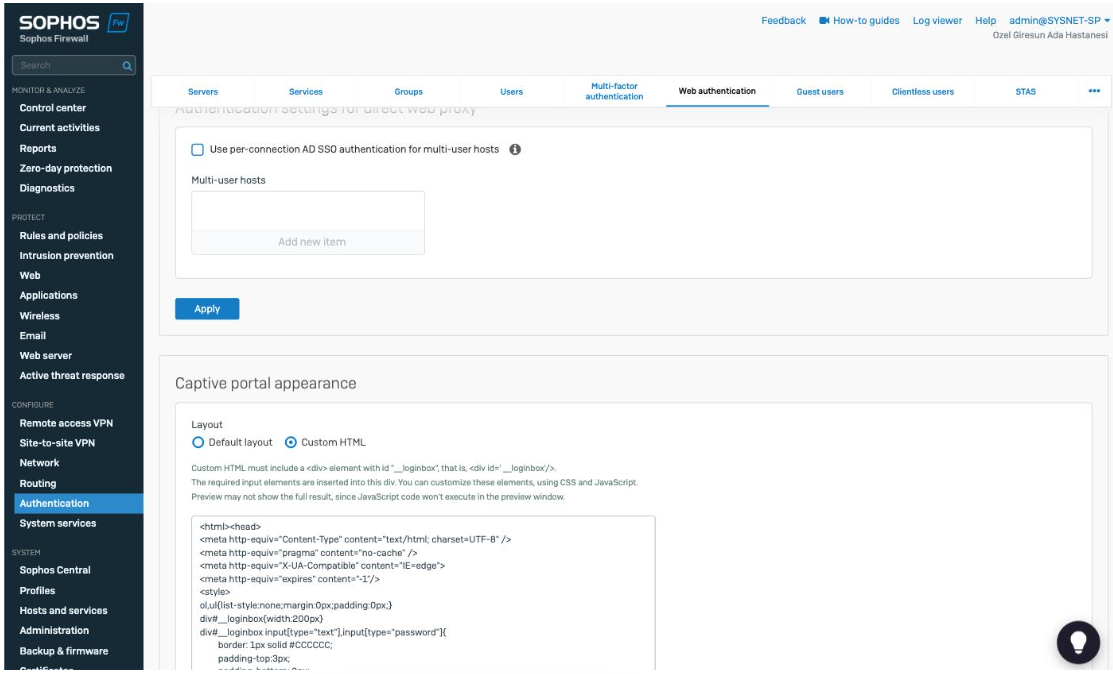
Screenshot 6: Web authentication — Custom HTML and the SignLogger code.
Step 6: Security Policies and the NAT Rule (Rules and policies)
On Rules and policies > Firewall rules, filter by Source zone = GUEST to list the rules from the guest network to other networks (DMZ, WAN etc.).
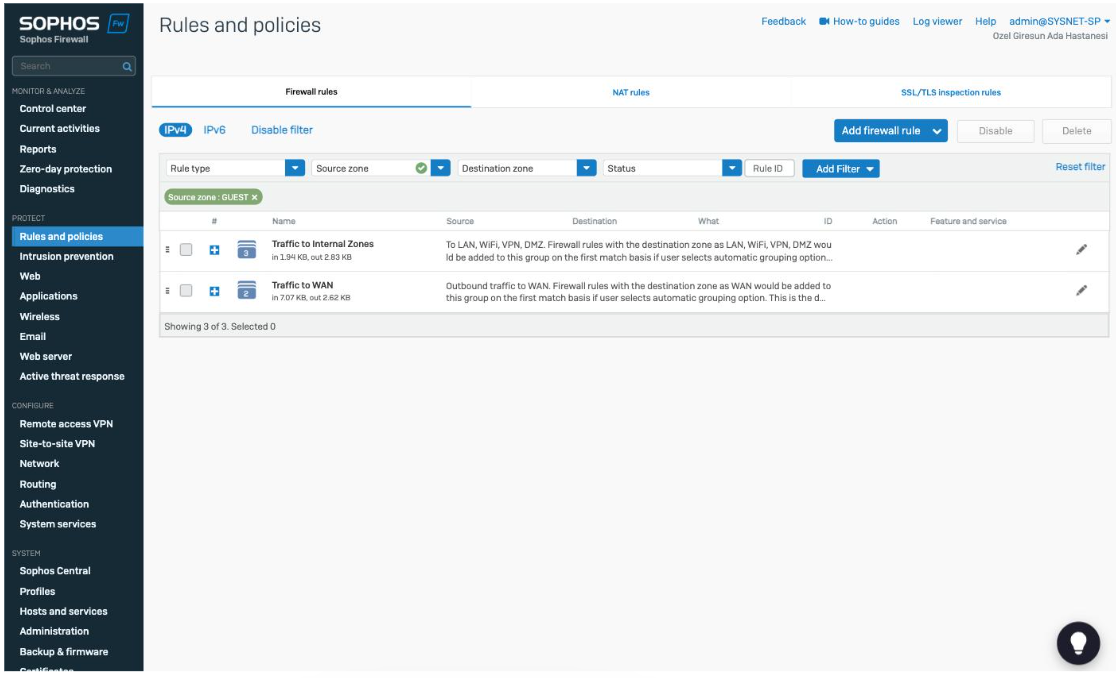
Screenshot 7: Rules filtered by the GUEST zone.
Open the guest-to-wan-all rule that provides internet access; under Identity make sure Match known users and Use web authentication for unknown users are ticked. This shows the captive portal configured in Step 5 to guests who have not yet authenticated — making SignLogger guest sign-in and logging work correctly.
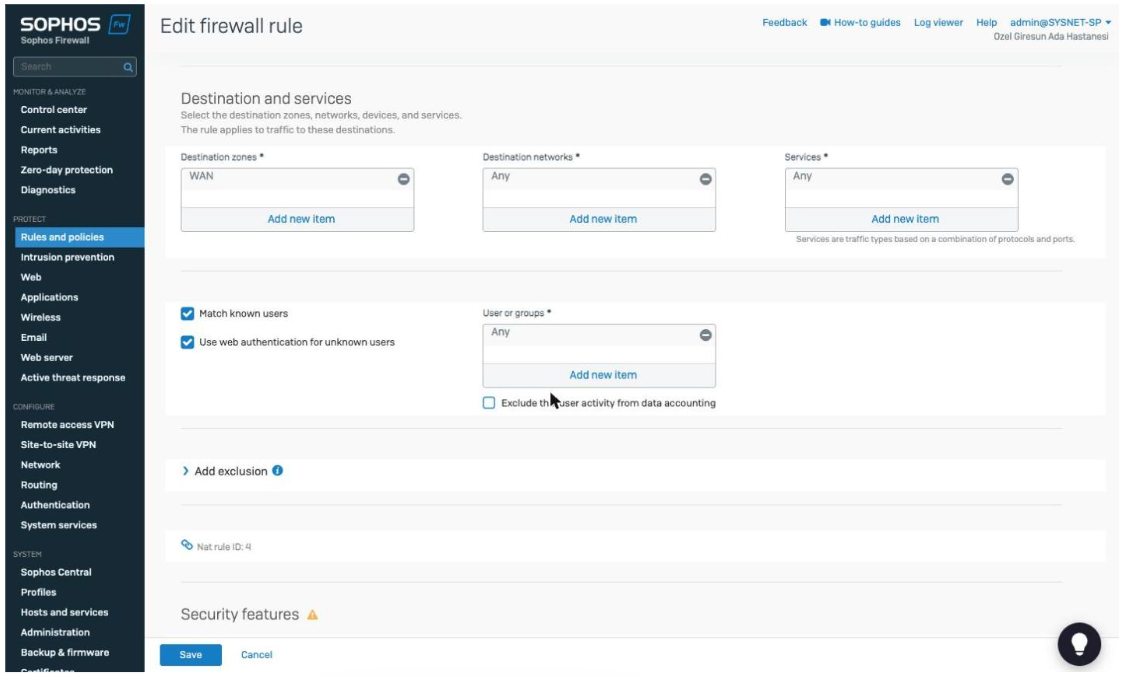
Screenshot 8: guest-to-wan-all — Identity settings.
Open the rule covering traffic to SignLogger (such as guest-to-signlogger-restrict) and create a linked NAT rule via Create linked NAT rule.
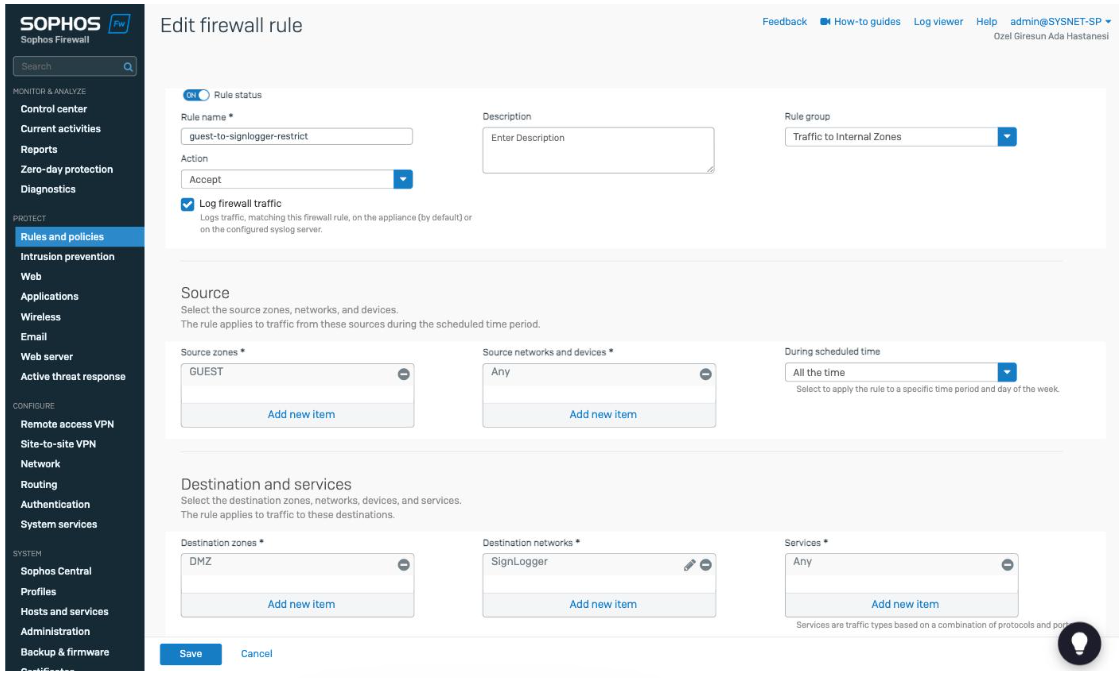
Screenshot 9: guest-to-signlogger-restrict — source/destination and Create linked NAT rule.
In the NAT rule set Translated source (SNAT) to MASQ, consistent with the other guest rules (guest-to-wan-all, guest-to-dns); leave Translated destination and Translated service as Original. Save and test SignLogger access from a client on the guest network.
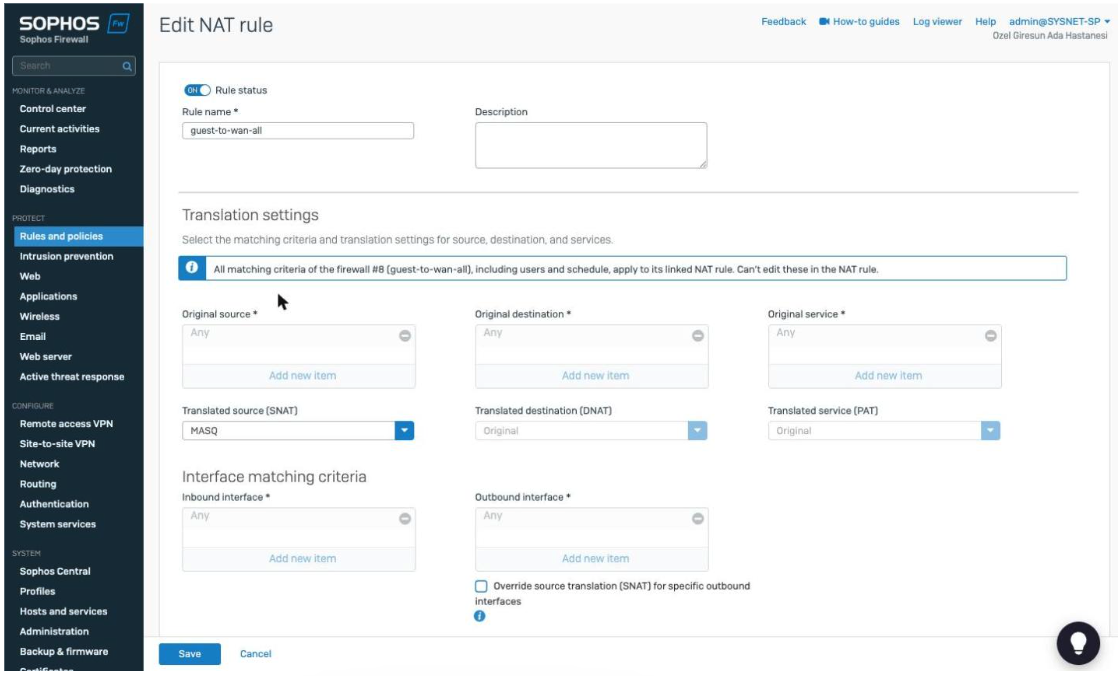
Screenshot 10: NAT rules — Translated source (SNAT): MASQ.
Conclusion
SignLogger integration on Sophos Firewall consists of defining the syslog server, selecting the log types, enabling API access, configuring RADIUS with accounting, activating it under Services, setting up the custom captive portal page, enforcing web authentication for unknown guest users, and completing the linked NAT rule. Applied in order, these steps deliver complete guest authentication and logging on SignLogger.