This guide explains step by step how to import the SignLogger virtual machine into a VMware ESXi environment using the OVA file. Following these steps you can complete the SignLogger VMware installation quickly, safely and without surprises — from downloading the OVA file to network configuration.
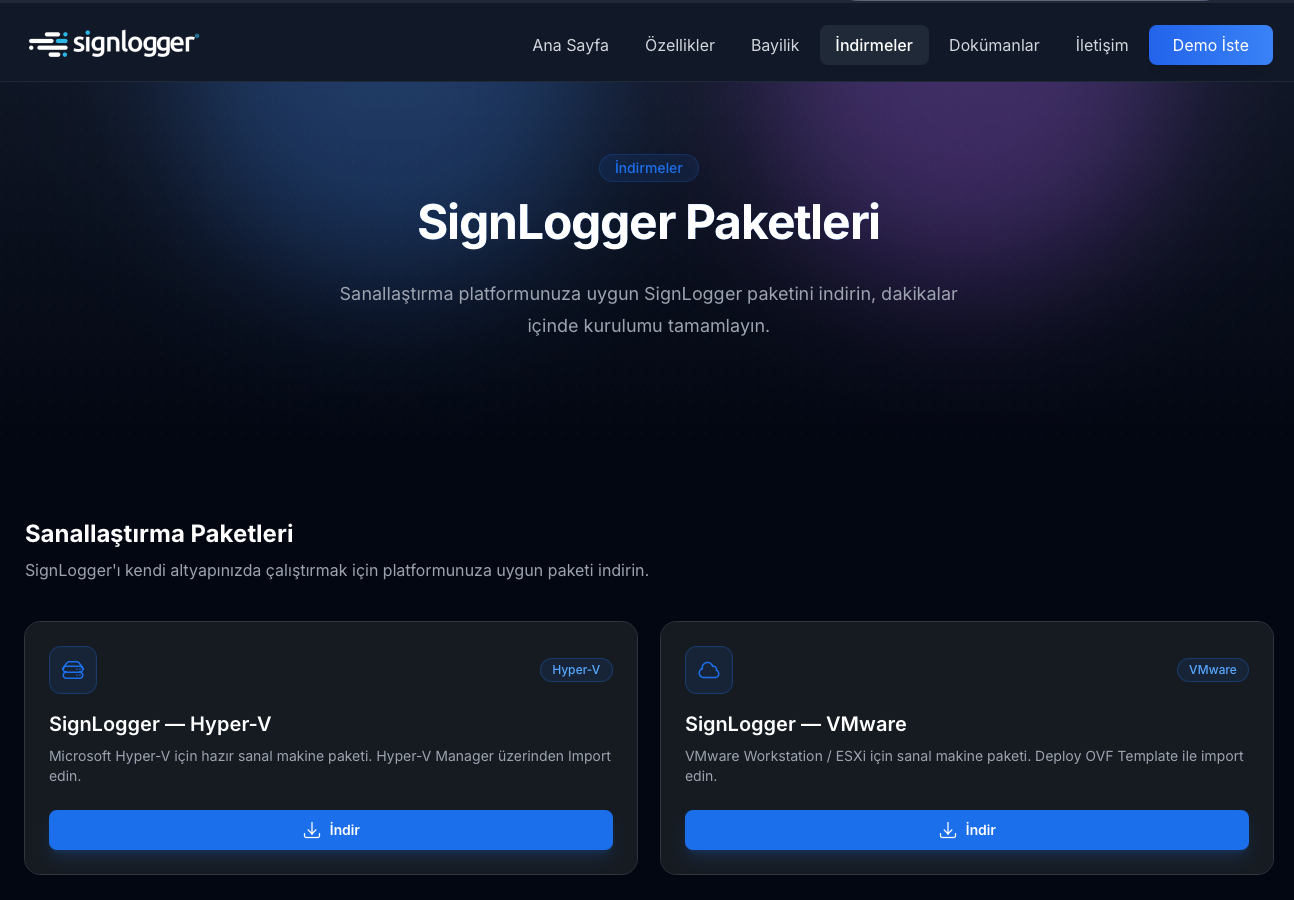
1. Downloading the SignLogger VMware Package
Before starting, open the Downloads section of the official SignLogger website and download the VMware edition. The package contains an OVA file prepared specifically for VMware; importing it directly into ESXi significantly shortens installation time and removes the need for manual configuration.
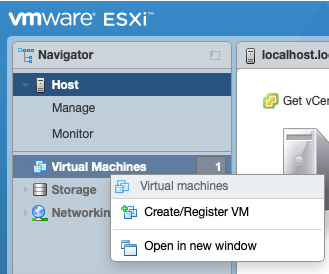
2. Creating a New Virtual Machine on ESXi
After signing in to the VMware ESXi management interface:
- Open Virtual Machines from the left menu.
- Right-click an empty area of the VM list.
- Click Create / Register VM.
This starts the new virtual machine wizard and takes you to the deployment type selection.
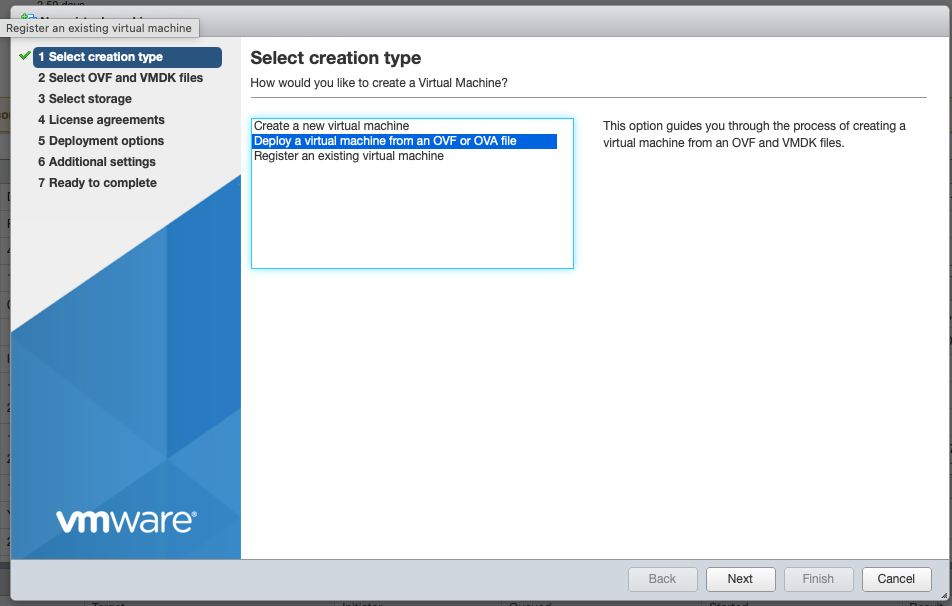
3. Selecting the OVA / OVF Option
In the wizard, select:
Deploy a virtual machine from an OVF or OVA file
This deploys the SignLogger OVA you downloaded directly into ESXi. Click Next to continue.
4. Uploading the SignLogger OVA File
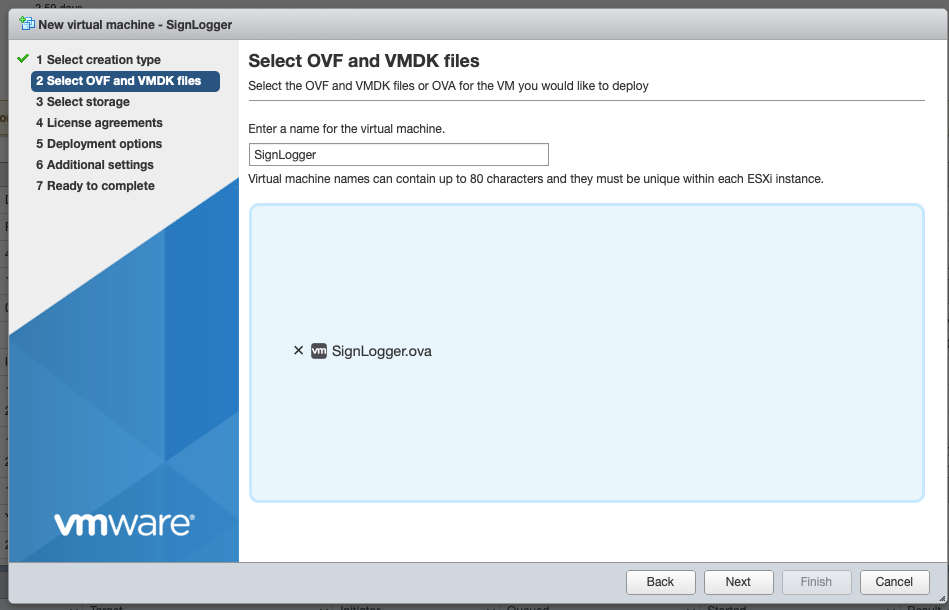
- Give the virtual machine a descriptive name (for example:
SignLogger-Prod). - Select the SignLogger OVA file you downloaded earlier.
- Click Next.
Remember that selecting the wrong file leads to installation errors — make sure you picked the correct OVA.
5. Selecting the Datastore
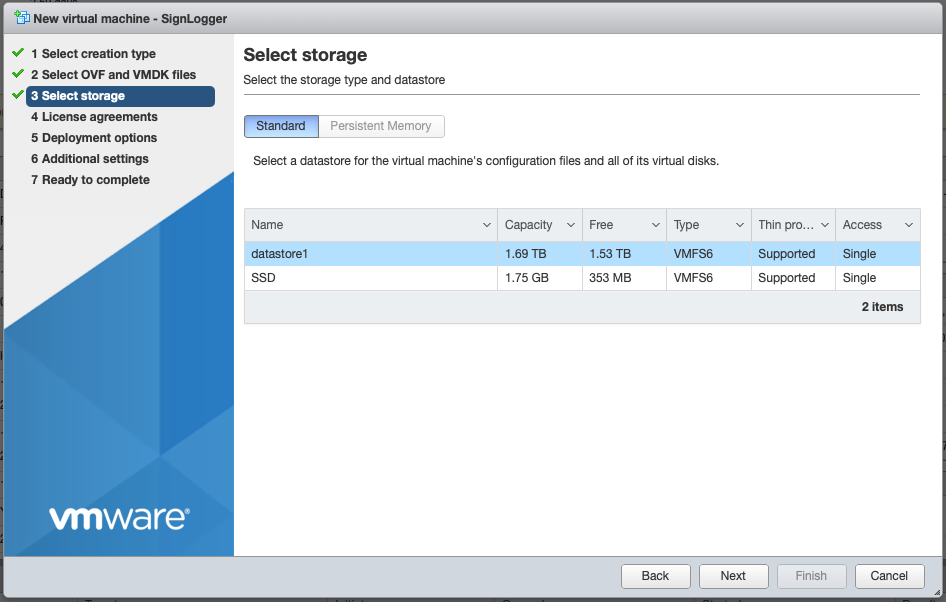
Choose the datastore the virtual machine will be installed on. When selecting:
- Make sure the datastore has enough free space.
- SSD-backed storage is recommended for performance and I/O efficiency.
6. Network and Disk Configuration
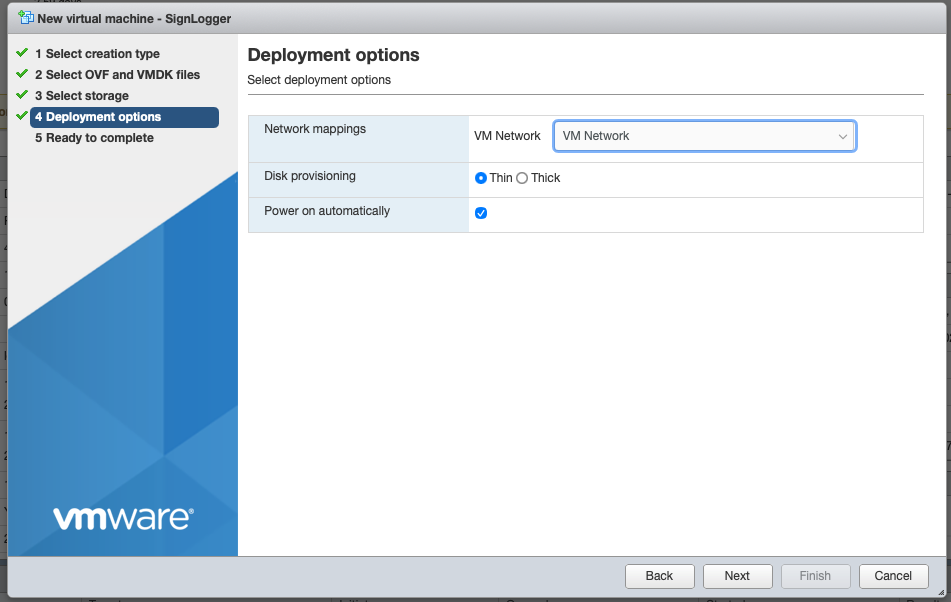
Network
Select the VMware network that matches your environment.
Disk Provisioning
Thin provisioning: disk space grows on demand — uses less physical space initially and saves storage.
Thick provisioning: disk space is allocated in full at deployment — more predictable, stable performance; recommended for I/O-heavy environments.
Click Next when done.
7. Starting the Import
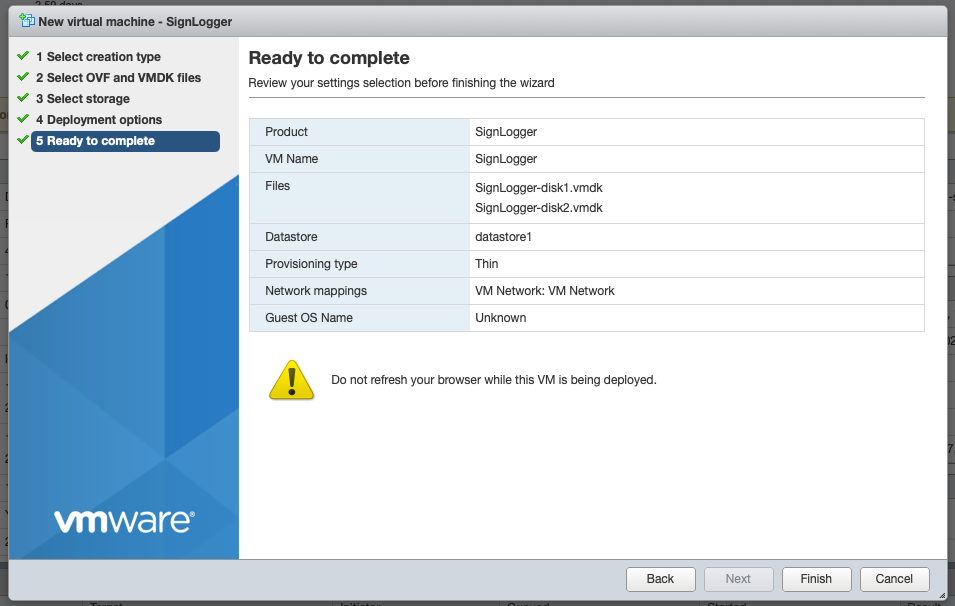
Review all settings on the final wizard screen, then click Finish. VMware starts importing the SignLogger OVA. You can follow progress in real time under Recent Tasks at the bottom of the ESXi screen.
8. Powering On the Virtual Machine
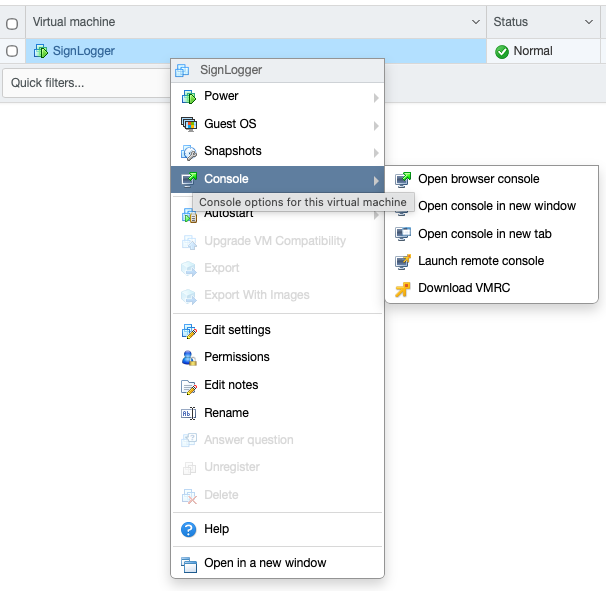
When the import completes, start the new virtual machine with Power On. To open its console:
- Right-click the SignLogger VM.
- Select Console.
- Click Open Browser Console.
The console opens and shows SignLogger's initial configuration interface.
9. IP Configuration
Automatic IP with DHCP
If DHCP is active on your network, the SignLogger VM obtains an IP address automatically — no further action needed.
Manual (Static) IP
If DHCP is unavailable or you prefer a fixed address, sign in to the console:
Login: admin
Password: Admin1234!
Then run the network configuration commands:
enable
configure terminal
set network ip
Choose option 1 for a static address and enter the IP in CIDR format, for example 192.168.1.100/24. To define a DNS server:
set network dns10. Result and Next Steps
With these steps completed, the SignLogger VMware installation is done and the virtual machine is running on ESXi. You can now open the SignLogger web interface in your browser, activate your license and start configuring signed logging. If you hit connectivity issues, check the network settings and the free space on your datastore.
Next: SignLogger License Activation and Firewall Device Setup Guide.